Tuesday, December 22, 2015

Pom Pom Tree Garland

When out shopping for the holidays I saw this beautiful pom pom garland at Pottery Barn but it was all white and my tree is flocked so the white blends in too much.  But, it got me thinking about how easy it would be to make my own!  
 This is a very easy project that anyone can do if you can thread a needle.
You will need:
Lots and lots of pom poms in any color you’d like
Clear beading line or a heavy clear thread.  I used Beadalon
Sharp Needle
Beads in any color and size you’d like just make sure your needle will fit through the opening
Lots of time!
*All the supplies for mine came from Hobby Lobby
Thread your need and just start adding the pom poms and beads in any pattern you’d like.  It doesn’t all have to be uniform like mine is but I’m a matchy matchy type girl so of course mine needed to be a pattern so it all matched.
 I used clear, silver and pearl beads along with white/silver pom poms and red pom poms to create my garland and the metallic bits in the pom poms glitter beautifully with the tree lights on.
 The clear beads also help catch the light and make the garland shimmer.
 Other than being time consuming this project is super simple to create!
Merry Christmas!

Thursday, December 17, 2015

Joy to the World Globe Makeover

If you are a Silhouette or Cricut user then you need to be stalking following Cutting for Business!  She has the best information and does great free downloads that are commercial use friendly.  

I saw her post on Instagram of a globe that she made and was all over it.  I just thought it was so simple and pretty so I got a mini globe and spray painted it black and then cut out the vinyl using her free download and that was it.  Simple and sweet.  Since making the first one I've done another that was a bit larger but still considered mini.  I have found the globes for under $8 at Home Goods or Marshall's but you for sure could look at thrift stores. 

 To download the file go HERE
Take the globe apart and paint the "ball" portion of the globe.  I painted mine with spray paint that had a satin finish but you could use chalkboard paint or some other type of paint that you brush on.  Once the globe is dry reassemble it and then cut out the wording and holly leaf and pick a spot where you want it and apply.  That is it.  So simple but so pretty!

 The second one I made was a wooden base and it looked great with the black globe but I forgot to take a picture of it.  Just letting you know that this looks good with all different bases.

 Joy to the World!

Thursday, December 10, 2015

Bath and Body Works Candle Lids into Ornaments

I buy a ton of 3 wick candles from Bath and Body Works (especially this time of year) and always hate throwing away the lids. It seems like such a waste when they are the pretty ones like they are this season on the holiday candles.  I always save them but rarely ever use them again but this season I decided to make tree ornaments out of them and it couldn't be easier!  So simple and yet they look so glittery and shiny on the Christmas tree.  

  The snowflake design on this year's candle lids is perfect to reuse it as a Christmas tree ornament.  

 To make yours you will need:
3 wick candle lids or another similar sized lid 
Drill and drill bits
Ribbon
Stickers or some type of embellishment
Rhinestones
Decorative paper
Scossors
Strong adhesive like E6000 or Hot Glue
 I didn't take photos of the process so I will just quickly tell you how I did mine.  Very simple to do!

Start by removing as much of the rubber ring on the bottom side of the lids.  I couldn't get mine completely off so I just used scissors to cut it way down.

Pick a ribbon you want to use and then choose a drill bit that isn't too small or too big for that ribbon to fit through.

Choose a spot on the lid you are using and drill your hole.  These wanted to jump around a bit when I first put the drill bit on them so make sure you hold them tight.  It does take a bit to get the drill bit all the way through but don't give up.

Once the hole is drilled put your ribbon through it and tie a knot at the top and cut the ribbon ends on an angle so they don't fray.  

Now take your decorative paper and make your circles.  For mine I made them 4 inches and you can use your Silhouette or Cricut to cut them out or you can just trace the lid and use scissors to cut them out.

Once the circles are cut out add your embellishments.  I just kept mine very simple and used chalkboard stickers but you could do so much with these!

Now it's time for you to glue in the circles to the back side of the lid.  I put the E6000 all around the rim of my paper circles and then pressed them into the bottom of the lid.  I let them dry completely before moving them and they have held up great.

If you are adding rhinestones you will need to do that with a tiny bit of adhesive.  I used E6000 and they have not moved at all since I put them on.  I just bought mine from the scrapbook section at a craft store and they have a bit of adhesive on them but not strong enough to hold them on for a long time.  I used one on each point of the flat spots of the snowflake and then one in the center. 

Be sure to let everything dry completely before hanging on your tree.
 Simple to create but they just add a lot of sparkle on the tree when the lights hit them.

I did several different designs for the back side of my ornaments.  
You wouldn't really even have to add anything to the back of the lid if you didn't want to because they really don't spin around too much at all.
Don't you just love a simple upcycle project?  I know I do!

Merry Christmas to all!

Friday, December 4, 2015

Elf on the Shelf is back!

Roy is here again!  It's been a fun few days since he got here to spend a few days with us.  I am sure there will be lots more fun happening around our house with our rotten little elf before Christmas Day so stay tuned.

I also hope you will start to share your Elf on the Shelf photos on Instagram using the tag #showmeyourelf2015.  There are quite a few of you sharing pics and I look forward to seeing what your elves are up to each day.
 This is for Instagram users.  I would love for you to tag the pics on Facebook too but for sure use the tag on Instagram if you have an elf that you photograph and share.

 Our little Roy showed up on December 1st through a magic elf door that he now has.

 Roy also brought a Balloon elf to celebrate his arrival.

 Roy is mapping out a shopping trip for him and Santa to make for Christmas gifts.  

 Looks like he has all the good shopping spots marked on our globe.

 Shop till you drop!

 Roy clearly doesn't know that NO one messes with my morning coffee and most especially not my coffee maker.  He was trying hard to fix it though.
 You think?

Oh Roy, you silly elf!


 Well Roy, thanks for creeping us all out!  When I saw what he had done I thought our son would find this hilarious but instead he couldn't stand walking into the kitchen because he said it was so creepy.
 
 The cabinets have EYES!  Yikes...I guess Roy is really watching this year.

Wednesday, November 25, 2015

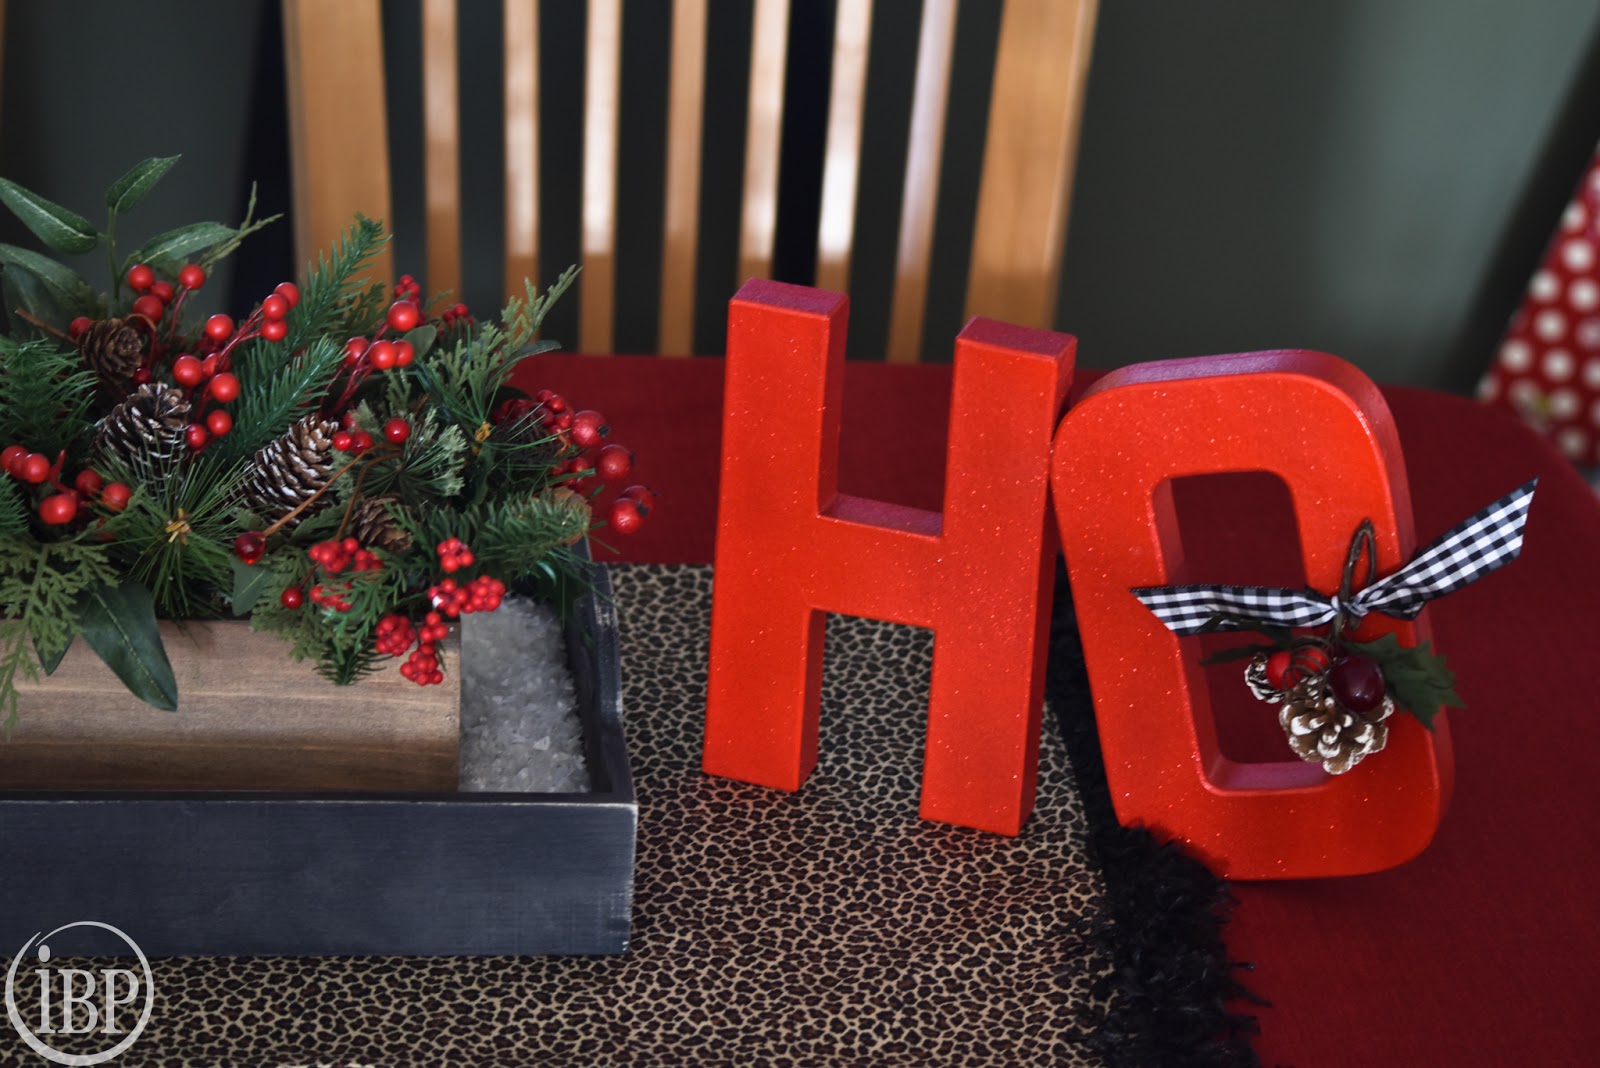
Copycat Crate & Barrel Ho Ho Ho Letters

I just love this time of year!  Everything is so festive and happy.  Of course there is the flip side of that too which means this time of year is exhausting, stressful, hectic, and more!  But mostly I love it.

I was perusing Crate & Barrel recently and saw these metal Ho Ho Ho letters and just loved them.  I am always looking for a project so I immediately thought about how I could remake them myself on the cheap.  I remembered I had a few paper mache letters at home and decided to try spray painting them to see if they would hold up.  It worked like a charm so I got more letters and sprayed them all with high gloss red paint and then did a final coat of red glitter spray paint over the letters.  Easy as can be right!?
 You will need:
H's and O's in wood or paper mache 
High Gloss red spray paint
Red Glitter spray paint
If you want your O tipped like mine then you will need E6000 adhesive
Ribbon
Sprig of berries or something similar 
  I sprayed all my letters on all sides letting them dry entirely before adding a coat of glitter spray paint in red.  I used a very light coat of the glitter just so it had a tiny bit of sparkle. 
 Once they were dry I angled the O in the direction I wanted it to be and added E6000 glue to the spot where the O touches the H and then added a piece of wire around the two letters to hold them together until they dried. 
 After the glue dried I then cut a piece of grosgrain ribbon and added a little sprig of berries and pine cones.  
I also remade this centerpiece from Target by adding quite a few pine cones and sprigs of pine and berries to spruce it up.  I got it on clearance last year but it looked sparse to me so it was an easy fix!
 I probably should have Ho Ho Ho out but I just used 2 sets on either side of my centerpiece and I'm very happy with them.
An easy and inexpensive craft to make which is my favorite kind!

Friday, November 20, 2015

DIY Christmas Ski Decoration

I know I'm not the only crafter that stalks the Dollar Spot at Target!  You will probably know all about these awesome skis they have right now in their bins and maybe even have some at your house. 
I actually passed these skis up numerous times because I just wasn't sure what I wanted to do with them even though I loved them.  I debated on painting them white and adding them to a pine wreath but I wasn't convinced that I loved that idea so I just kept walking by them.  Then I needed something to hang on my wall that wasn't too large but looked Christmasy so off I went back to the Dollar Spot to see what I could come up with.  The skis were added to my cart and I came right home to get a set made for my wall.  I loved them so much I made a second set and then made a bunch for gifts.  After getting about 12 extras done I'm all set for teacher gifts, neighbor gifts, family gifts etc.  You can never beat an inexpensive gift that looks like a million bucks!
 You will need:
Set of Skis from Target or anywhere you can find skis
Pine 
Berry picks like above or just berry garland you can cut into small pieces
Floral wire or floral tape
Ribbon 
 To make the skis a little dressier you will need to "clump" your berry pieces and pine pieces together and arrange them in the layout you want and wrap the "stems" with floral wire or tape so they stay together fairly well.  Cut a piece of ribbon long enough to wrap around the center of the skis and lay your berry arrangement on top of the skis and then tie a pretty knot around the skis and berries with your ribbon.  I never cut my ribbon from the spool until after I've tied it off so I don't waste any but once you do one you'll know about how much you need.
When you cut your ribbon be sure to cut it with sharp scissors and cut at an angle so it doesn't fray at all.  I used 2 inch wide Grosgrain but you could use wired ribbon or satin ribbon or twine etc.  I chose to skip a bow but you could certainly do a bow instead of the knotted ribbon.

I want to mention how amazing these Berry Picks are that are available from Target in their Christmas Section.  They work so well for wreathes or other diy projects.  They come in a box and you get a bunch!

My mom is planning a set of these using a poinsettia and a few bells along with some ribbon.  You could use most any pretty arrangement in the center of the skis.
 These skis come ready to hang but since I didn't want to make holes in my wall for just the holiday season I used 3M picture hanging removable tabs to hang mine and they are staying put perfectly without ruining my walls.  
 Easy gift for just about everyone and it doesn't break the bank!

Thursday, November 12, 2015

Reupholstered Leopard Print Dining Room Chairs

So, things have been getting a little "wild" up in here recently!  I love love love leopard print in the right design and hate it in other designs so it has taken me a long time to find the fabric I really want.  I have known for awhile now that I wanted to add a leopard print to my dining room chairs but it has meant a lot of searching for the right print and the right price because darn, some of these upholstery fabrics are e-x-p-e-n-s-i-v-e!  Finally, my mom spotted this particular fabric at Hobby Lobby and the price was amazing so I jumped at the chance to buy yards and yards of it so I could have several things made out of it!  It was just $9.99 a yard and of course it was on sale so it came down to $7.00 a yard!  Oh be still my little leopard loving heart!
 I have reuhpolstered my dining room chairs before and it is so simple but does take time and patience to get them just right.  Don't let the task scare you because really it's simple!

You will need to measure your seat cushions allowing for the fabric to wrap around all edges.  The measuring is the most important part of the prep work because the wrong size will ruin your project and waste a lot of fabric.  I needed my cuts to be 24 inches by 27 inches and that still allowed me some extra fabric to cut off once I was finished stapling. 

You will need a heavy duty stapler and the right size staples.  I used 5/8 inch heavy duty staples and they were perfect.  I always go a little staple crazy when I reupholster something but I would say space the staples evenly around the entire perimeter of the chair not being afraid to keep them fairly close so the fabric stays in place with regular use. 
 You will need:
Plenty of fabric so it's important to measure and calculate how much you will need prior to purchasing
Heavy duty staple gun
Heavy duty staples
Dining room chairs or something of the like
Screw driver to remove the seat cushions
Possibly plyers to remove old upholstery
PATIENCE!
Believe it or not this seat cushion fabric used to be a bold sage green but after about 8 years it has faded to the point of looking grayish.  As you can see it was time to change them out!

I didn't do any pictures during the process which was a total "duh" moment on my part.  I really don't know what I was thinking because I usually try to post pictures of the process.  The only tricky part is the corners of each cushion if they aren't perfectly square.  You are golden if they are square but if they are rounded corners as mine are then you will just need to play with the corners until you are happy with the way they look.  I had to take out several staples as I was doing the corners so I had a little more wiggle room with the fabric and I wouldn't start with the corners but one of the flat sides.  You can do it!

And the AFTER....
 I am absolutely crazy about how these turned out!
A much needed update is done on the cheap!