Tuesday, May 31, 2011

. . . Cookie Time Tuesday . . .

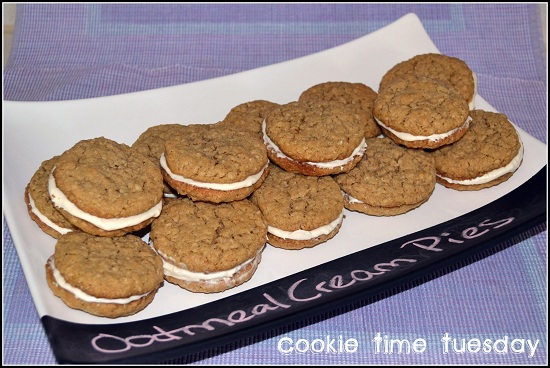
Move over Little Debbie, there is a new Sheriff in town!  These cookies are Amazing!  I love Little Debbie Oatmeal Cream Pies but I will never think of them the same way again now that I've made these homemade Oatmeail Cream Pies.  The cookies so moist, soft and chewy then the cream is the perfect amount of sweetness.  I can just about guarantee these will be a hit.

Print Recipe Here
You will need:
1-¼ cup Butter, Softened
1 cup Light Brown Sugar, Packed
½ cups Granulated Sugar
1 whole Egg
2 teaspoons Vanilla Extract
1-½ cup Flour
1 teaspoon Baking Soda
½ teaspoons Salt
½ teaspoons Cinnamon
3 cups Quick Oats
For Filling:


½ cupsUnsalted Butter, Softened
1 teaspoon Vanilla Extract
2 cups Powdered Sugar
2 Tablespoons Milk
•  Gather Ingredients
• Beat butter and sugars until fluffy
• Combine the dry ingredients (except for Oatmeal)
• Slowly add flour mixture to butter mixture

•Add Oatmeal and mix well
• The dough is thick and easy to roll
• Roll into evenly sized balls or use a cookie scoop
• Bake for 11 minutes in a 375 degree oven

• Gather your ingredients for the filling
• Make sure the cookies are completely cooled
• Get ready to frost
• Frost the bottom of one cookie and place another cookie on top

• Look how soft and moist those look
• Once you've made a sandwich out of the cookies let them "dry"
• I left mine out for about an hour to let the frosting sort of harden up
• Serve and enjoy the compliments

Monday, May 30, 2011

. . . Pink Lemonade Cake . . .

There is a bakery and yogurt shop in our area that makes amazing cakes--it's called Maxie B's  One of our absolute favorite cakes is the Pink Lemonade Cake.  Everytime my husband has a slice he says he wishes I could make one.  I finally got around to it for our Memorial Day Cookout and it was fantabulous to say the least!  The cake was gone within minutes.  It's a really refreshing cake and it is the perfect combo of sweet and tart.  It was a very moist cake.  The next time I will make a 4 layer cake instead of 2 because it was such a great hit.  The original recipe came from Tasty Kitchen but I did change it up a little bit.
:::::::::::::::::::::::::::::::::::::::::::::::::::::::::::::::::::::::::::::::::::::::::::::::::::::::::::::::::::::::::::::::::::::::::::::::::::::::::::::::::::::::::::::::::::::::::::::: 
Print Recipe HERE

• Gather ingredients
• Combine the cake mix and lemonade powder.  
•Add the rest of the ingredients and mix well
• Spray your 9 inch round cake pan and line the bottom with parchment paper 

• Pour half of your batter in one cake pan and half the batter in another cake pan
• Bake at 350 degrees for about 30 to 35 minutes and remove from oven to cool
• For Frosting you will need to gather your ingredients
• Beat butter and powdered sugar together until blended. 
Then add the rest of the ingredients except for the food coloring
*My frosting turned out a little runny like a glaze because I thinned it out a little too much.

• Mix in your food coloring by hand until you get the desired color.
• I wanted a deeper yellow so I added a little more color
• Place the first cake on a cake plate and frost the top so it will seal the cakes together
when the second layer is added
• Now you are ready to frost the entire cake

• Frost the entire cake with a Crumb Coat
• Now frost the entire cake with frosting
• Pretty 
• Add some mint leaves and lemon slices for garnish

Isn't it so pretty with the pink and yellow? 
You could make pink frosting by using Pink Lemonade Concentrate and red food coloring. 
I preferred having the contrast instead of all pink.


Linking Here:

. . . Happy Memorial Day . . .


Saturday, May 28, 2011

. . . Red, White & Blue . . .

It's Memorial Day Weekend!  It is a time for swimming pools to open, summer to kick off, start vacations and of course celebrate the "RED, WHITE & BLUE".  If you have a picnic or party to go to this weekend here is a quick roundup of a few things that you might want to take with you to help get in the spirit of things.

Memorial Day Party Printables @ Homespun with Love
Bomb Pop Cupcakes @ Save the Date for Cupcakes
America the Beautiful Printout @  Anything But Perfect
Mini Fireworks Cupcakes @ Lady Behind the Curtain
Top Hat Memorial Day Cupcakes @ Delightfully Noted
Star Spangled Kabob Treats @ Lady Behind the Curtain
Patriotic Strawberries @ Plain Chicken
All American Hot Dog Stand @ Hostess with the Mostess

What are you doing for Memorial Day?

Friday, May 27, 2011

. . . Fun Friday Finds . . .

Last week Inkspot Workshops did a post on the things that she can't live without in her business and everyday life and that gave me an idea for my Fun Friday Finds.  I have a few things that I would want with me on a deserted island and I thought I'd share with you.  This isn't the list for my business but for my everyday life.  Sometime soon I'll do a post on the business tools I must have.


Wednesday, May 25, 2011

. . . Etsy Subway Art Download . . .

I love all things Etsy!  Even if I didn't run an Etsy store I would still love it and be a big supporter of the Handmade Industry.  I thought about all of us that are dedicated Etsy Sellers and Buyers and thought what a great Subway Art that would make.  I had this great damask frame that was just itching for a fun piece of artwork to go in it and I loved how my Etsy artwork turned out.  I thought why not make it a FREE DOWNLOAD!?  There are several color options to choose from.  It's simple--just download from www.scribd.com and print onto cardstock and put in a 5x7 photo frame!  Easy peasy. The links for the colors are below each photo in this post. 


:::::::::::::::::::::::::::::::::::::::::::::::::::::::::::::::::::::::::::::::::::::::::::::::::::::::::::::::::::::::::::
•••••

•••••  

•••••
•••••  
••••• 
••••• 
•••••
••••• 
•••••
Linking here:

. . . Cookie Time Tuesday . . .

I apologize for the delay in posting Cookie Time Tuesday Wednesday.  It was such a whirlwind day yesterday and I thought I was going to have plenty of time to post and before I knew it the day was over.

This cookie may not seem all that unusual or all that great but let me tell you they are awesome!  I have always loved Oatmeal Raisin cookies but never make them and the other day I was really craving the taste for one.  I started hopping around for a really great recipe and found one at Smitten Kitchen--a fantastic Blog--and I adapted it to my tastes.  This cookie reminds me of a granola cookie or a breakfast cookie.  The right amount of chewy and the right amount of sweet.  I think you will really enjoy it!  The original recipe didn't have chocolate chips but a girl has to have some chocolate so I added chocolate chips and I changed the walnuts to pecans. 

::::::::::::::::::::::::::::::::::::::::::::::::::::::::::::::::::::::::::::::::::::::::::::::::::::::::::::::::::::::::::::


Print recipe HERE

You will need:
1/2 cup (1 stick or 4 ounces) butter, softened
2/3 cup light brown sugar, packed
1 egg
1/2 teaspoon vanilla extract
3/4 cup all-purpose flour
1/2 teaspoon baking soda
1/2 teaspoon ground cinnamon
1/4 teaspoon salt
1 1/2 cups rolled oats (old fashioned)
3/4 cup raisins
1/2 cup pecans, chopped (optional)
1 cup Chocolate Chips (optional)

• Gather your ingredients--I like to get everything measured out
before I start the recipe because it just makes things easier.
• Cream the butter, brown sugar, vanilla and egg together until smooth
•  Combine your dry ingredients and sift together. 
Then add the mixture to the butter mixture and combine well
• Time to add the yummy goodness of the oats, raisins, chocolate chips and pecans

•  The finished cookie dough is thick and chunky
•  Drop by rounded spoonfuls onto a Silpat or Parchment Paper lined baking sheet
•  Bake for about 10 to 12 minutes and let rest on the cookie sheet for a few minutes
•  Trasnfer to a cooling rack and cool completely


How can you go wrong with a cookie that looks like this?

Friday, May 20, 2011

. . . Fun Friday Finds-PB&J . . .

I L♥ve anything with Peanut Butter in it and having jelly added to it sweetens the deal.  I know I usually feature projects or items to purchase but I have found so many great recipes for PB&J that I thought I would do a Fun Friday Finds on the combo.  I think you will find all these recipes to be scrumptious!


.............................................................................................................................................

• PB & J Oatmeal Muffins @ The Ungourmet
• PB & J Cereal Bars @ Cinnamon Spice & Everything Nice
• PB & J Sandwich Cookies @ Cascadian Farm
• PB & J Pound Cake @ Cooking on the Side

• PB & J Granola Bars @ Yummy Mummy
• PB & J Popcorn @ The Cooks Next Door
• PB & J Thumbprints @ For the Love of Cooking
• PB & J @ Baking Junkie

• Grilled PB & J Sandwiches @ Buns in my Oven
• PB & J Sushi @ A Bicycle Built for Two
• PB & J Pancake Sandwiches @ Weelicious
• PB & J Mousse @ Rachael Ray

• PB & J French Toast @ Chili Cheese Fries
• PB & J Ice Cream Pie @ My Social Chef
• PB & J Cupcakes @ The Girl Who Ate Everything
•  PB & J Cookie Cups @ Barbara Bakes

What is your favorite PB & J recipe?

Linking:


Thursday, May 19, 2011

. . . Ramen Noodle Broccoli Slaw . . .

I think I should have named my blog "Itsy Bitsy Kitchen" instead of "Itsy Bitsy Paper" because I love posting recipes and finding new recipes to try out and share here.  I don't mind spending a lot of time in the kitchen but I really like a quick and easy recipe that is yummy. 

This recipe is one that a friend of mine gave me a few years ago and it's always a hit! 


You will need:
Broccoli Slaw
Slivered Almonds
Roast Chicken Flavored Ramen Noodles
Sunflower Seeds
1 Bunch of Green Onions
Sugar
Vinegar
Oil

Print Recipe HERE

• Gather your ingredients
• Combine crushed ramen noodles, broccoli slaw
• Add sunflower seeds, almonds and green onions-mix well
• My son loves helping in the kitchen so I never discourage him and this is a quick and simple recipe he can help with.

• Combine all the dry ingredients
• Mix up the "dressing" mixture and pour over the ramen combination
• Stir well and place in fridge for at least 6 hours before serving (I prefer overnight)
• Put in a serving bowl and sit back and wait for the compliments to roll in.

Linking Here:

Wednesday, May 18, 2011

. . . DIY Recipe Card Holder . . .

Everytime I am using a recipe to cook with I get frustrated not having something to prop it up on.  I realize you can buy nice recipe card holders but I wanted to create something fun and colorful.  This is a super easy way to make a Recipe Card Holder.  What a great gift too!
You will need:
Glue (E6000 is my favorite)
Spray Paint
Mod Podge
Patterned Paper
Plaque
Kitchen Clip or any large clip
Button
Plastic easel photo frame
• Gather up all of your supplies--my plaque came from the Dollar Store but my son dropped it and while I was spray painting I realized it had a big crack in it.  I luckily had another one from a previous project so I used it instead.
• Sand your board
• Spray paint your board in the color of choice.  I used Watermelon by Krylon
• After the plaque has dried completely (I used 3 coats of paint) cut a patterned sheet of paper to the size of your plaque.  I used spray adhesive to put the paper on the back of my board but you could use mod podge.  Cover back side of board.
• Now that you've covered the back side of the board apply the clip where you want it on your board.  Use E6000 adhesive to attach it.  You may want to sand a small spot where you are placing it if you used a high gloss finish paint.
•  I used a 4x6 acrylic easel type photo frame from Target.  Cover the front "flat" side with E6000 glue and attach it to the back of your board to create the "stand" that your board will prop against. 
• I didn't like just the boring clear acrylic so I cut a coordinating paper to place inside the holder
• Once the clip has dried I used a 2 inch scallop punch and cut out some flowers. I then placed them where I wanted them.
• Get your Mod Podge and a foam brush ready
• Apply with Mod Podge
• Coat the entire row of flowers with the Mod Podge to seal
• Once everything is dry you can sit it up and admire your handy work.
• I love the back of the board even though it won't show that often
• I sanded all my edges to let the white of the original board show through
• I then applied a big button to the clip.  It is almost exactly the color of the paint.
• Easy Peasy right?  I will be using this handy dandy Recipe Holder all the time!

Linking Here: