Thursday, October 30, 2014

. . . Crock Pot Mississippi Roast . . .

The first time I made this roast it was a chilly, rainy fall day.  It was the kind of day that was just screaming for a dinner made up of comfort food and this totally fit the bill.  It made the house smell so amazing!   I am making it again today as I write this blog post and man, I just want to crawl in that crock pot and never leave because it smells so darn yummy!  

I really don't know why it's called Mississippi Roast but that is what I keep coming up with when I google it and see it on Pinterest so we are going to stick with that name.  It is very fast to make because it's just a couple ingredients and it's all done in the crock pot.  I find that anyone that tries it is hooked so I hope it is a keeper for you and your family too.
 
Mississippi Pot Roast
1 Chuck Roast (I get a 2 to 3 pound roast)
1 envelope of Ranch Dressing mix
1 envelopes of Au Jus mix
1 stick of butter
5 to 6 pepperoncini peppers
1/4 cup water

Place roast in crock pot and sprinkle the Au Jus Mix and Ranch Dressing Mix over top of it.  Place your stick of butter on top and sprinkle with the 1/4 Cup water.  Place 5 to 6 peppers around the top and cover and let cook all day.  You can serve immediately in chunks or you can remove it and shred it and pour the juices over it.  I shredded some and left some in chunks.  I sometimes prepare a gravy as you see in the photos but it's perfect without it too.

 Gather your ingredients

 Add everything to your crock pot. 
 I always use crock pot liners which are the best invention ever since they makes clean up a breeze.

Don't be afraid of adding the peppers because they aren't really a hot pepper. If you cut them open the roast will be much spicier but if you leave them whole they just provide a very nice flavor.  The heat gets released from the pepper when they are cut so I just leave mine whole since I'm not a big fan of real spicy food.

 I cooked mine in the crock pot for about 8 hours and it was perfect because it fell apart so nicely and was so tender.

 I shredded most of my meat but my husband likes it in chunks so I left some of it like that as well.  This makes amazing sandwiches as well.

 Serve with some of the juices drizzled over it or make a gravy with the juices and put that over your meat and potatoes.  

I know this meal is a little scary because you use a whole stick of butter but it really is worth the splurge.  You can also use some beef broth in place of a little of the butter to help save a few calories.  

I hope you enjoy this meal as much as we do!

Tuesday, October 21, 2014

. . . One Pot Cheeseburger Pasta . . .

I just love a one pot meal!  It makes clean up a cinch and usually they are very tasty. The best part is they are FAST and with our lives being so busy that is something all of us are looking for.

It seems like every night we are rushing around with homework and after school activities and making dinner is something I stress about because of the lack of time in the evenings.  I hate feeding my family fast food or take out so I try to come up with fast meals or crock pot meals during the week.  This is going to be in our recipe rotation for sure because it was a hit with all of us which is a difficult thing to achieve. 

Recipe:
1 tablespoon olive oil
1 pound ground beef
1 onion, diced
Salt and black pepper, to taste
1 28-ounce can diced tomatoes, do not drain
1 8-ounce can tomato sauce
2 cups chicken broth
2 cups water
1/4 cup ketchup
2 teaspoons dijon mustard
1 pound rotini pasta
2 cups shredded cheddar cheese
1 tomato, diced (optional)
2 green onions, chopped (optional)
Dill pickles, chopped (optional)
Crumbled bacon (optional)
Shredded lettuce (optional) 
Heat olive oil in a large stockpot over medium high heat. Add ground beef and onion and cook until beef has browned and onions are translucent, about 3-5 minutes.  Make sure you crumble the beef as it cooks; season with salt and pepper, to taste. Drain excess fat and return to burner.

Stir in diced tomatoes with the liquid, tomato sauce, chicken broth, ketchup, mustard, pasta and 2 cups water. Bring to a boil and then cover, reduce heat to medium/low and simmer until pasta is cooked through, about 15 minutes. 

Remove from heat and top with cheese. Cover until cheese has melted, about 2 minutes. Plate the pasta and garnish with tomatos, green onions, pickles, shredded lettuce and crumbled bacon, or just serve it with your choice of toppings. 
Recipe adapted from Damn Delicious and No. 2 Pencil

Once your beef and onions are cooked through drain fat and stir in diced tomatoes with the liquid, tomato sauce, chicken broth, ketchup, dijon mustard, pasta and 2 cups water. Bring to a boil and then cover, reduce heat to medium/low and simmer until pasta is cooked through, about 15 minutes.
Once the pasta is cooked through then add your cheddar cheese and recover for a couple minutes until it is melted.
 
Top with green onions if you like them and if not then just have your optional toppings ready for each person to use when they plate their pasta up.  Yummy!
 
Serve to your family and listen to them oooh and ahhh over how yummy this One Pot Pasta is!
 
The perfect weeknight dinner!  To the table in minutes and very few dishes to clean up!

ENJOY!

Friday, October 17, 2014

. . . DIY 2x4 Wooden Pumpkin Patch . . .

If you are a follower of Pinterest then I am sure you have seen a variation of these wooden pumpkins floating around!  I know every time I click on Pinterest I see at least a couple Wooden Pumpkin Pins.  One day my mom said she really wanted to make a set of Wooden Pumpkins and I thought it was so funny because for at least a month I had been thinking about it since I keep seeing them on Pinterest.  I would say within minutes of that conversation there was a Home Depot run.  We did 5 pumpkins for our sets but sometimes you will see just 3 or 4 and even just 2 of them.  The best part about a project like this is that each person is going to end up with a bit different look and will probably display them a little differently.  I have seen them with stripes, polka dots, chevron stripes, monograms, etc.  So many ways to do them.  

We both are very happy with how easy this project was and how cute they are!  I can't wait to make something else using wood blocks!  So fun!
You will need:
2x4 cut in sizes of your choice.  We made our pumpkins 4,6,9,12 and 15 inches tall.  The wood came from Home Depot and they cut it there.
3/4 inch Dowel Rod cut down to size for your stems.  The stems used were just random so I don't have exact measurements of what are shown here.  Just give it a good estimate  
Orange Paint, we used American Decor Chalky Finish paint from Decoart.  It's by far my favorite chalk paint.
Brown Paint for your stems-we used a color my mom had from Valspar.
Silk Leaves
Floral Wire or some flexible wire to make the stems
Sand Paper/Power Sander
Minwax or a wax of your choice (This step is optional but makes a beautiful finish to your pumpkins)
Chalkboard for your sign.  We used little chalkboard place cards from Michael's.  
Chalk and/or chalk pen
E6000 Glue

 You will want to sand your board pieces really smooth so that you have a nice finish.  A power sander is always nice for this kind of job but if you don't have one just use a sanding block or a piece of medium grit sandpaper to get it all smooth.

Use your orange paint to cover all sides of your boards.  I did 2 coats of the American Decor Chalky Finish paint and it worked really well.  It was a little bright at first but with all the distressing I did and then waxing the blocks it ended up a nice rich orange so don't panic if yours looks a little bright.

Once your paint has dried on all sides really well you can distress the boards.  I used my power sander with a fine grit sandpaper and went over the whole block lightly and then went back over the edges to actually take some paint off.  After the sanding it really lightened up the orange but no worries.
 I wanted mine to have more dimension so I used a Stain Pain to darken the blocks.  I dabbed the stain pain on a piece of white t shirt and then lightly rubbed it into the block.  If you use a pen like I did you won't want to put the pen directly to the wood because you end up looking like you just have lines.  You just keep adding the stain where you want it and blending it in with the t shirt fabric.  Once I stained mine I very lightly went back over it with the sander.  

Now on to the wax.  I used Minwax and applied it to all the blocks with a wax brush.  I personally love a wax brush but some people like to just rub the wax on with a piece of cotton fabric.  Either way works.  Once the wax dried up a bit I went over it and buffed it out with a white t shirt and really brought up the shine.  Then I used a 400 grit piece of sandpaper and went over all the blocks on all sides to make a really smooth finish and then rebuffed them with the t shirt fabric.  They feel like silk now.  That is my favorite about finishing with wax because it makes the piece so smooth. 
  As you can see in the first photo above, once the wax is done and you've sanded all the pieces again you end up really getting some dimension and it brings up some dark spots.  You may not like this look so if you don't just skip over it.  

I skipped photos of doing the stems and curling the wire for the top of the pumpkins so I will just tell you what I did...You will paint your stem pieces a dark brown and you can distress and wax these as well but you wouldn't need to use your stain on these since they are already dark brown.  You will then decide which is the top of your pumpkin and use E6000 glue to apply the stems.  Let these dry really well or the stems will slide all over the place.

For the little curly wire we used 2 colors of floral wire.  We wrapped 2 pieces together to get a heavier look and then twisted them around each stem and curled them around a pencil and then stretched them out to our liking.  Then I glued a few green leaves to the top of each pumpkin.  Some got 2 leaves and others got one--just do them to your liking.

We got little chalkboard clothespin place cards from Michael's and then removed the clothes pin from the back and painted the back so it looked finished using the same technique as the pumpkin blocks.  I distressed the back of my sign quite a bit so it looks really "beat up" but that was the look I was going for.  I then went out in my yard to gather a few sticks and sanded them a little so they were nice and smooth.  I then used the E6000 glue to attach the sticks to the back of the chalkboard to make a little standing sign.  Tied a piece of wraphia ribbon around the stick and it was done.  
Have you ever heard of Tacky Wax?  If not it's something you should own if you like to decorate.  We collect Department 56 Snow Villages and this stuff always saves us when we set them up and the little pieces won't stand up etc. but I have been amazed at how often I use it when decorating around the house.  It will hold candles in place like nobody's business!  I rolled a little ball of it and placed it on the bottom of each of my pumpkins to hold them in place sine they were going to be sitting on a tray and might be wobbly.  Worked like a charm! 
 I put my finished pumpkins in a basket/tray combination and then filled the base with dried green peas.  I then stuck my sign in and added a tiny dab of Tacky Wax to the back of the sign and leaned it against the pumpkin to make it look like it's standing on it's own.  Worked out perfectly.

This was a very simple project but plan on a day to get it all done since the paint and glue has to dry thoroughly before moving on to the next step.  I promise it will be worth it though!
I am sure this sounds funny but I think the sign is probably my favorite part of this whole project.  I seasoned the chalkboard by rubbing chalk all over it and then lightly wiping it away so it didn't remain so "new" looking.  I then did the writing with a Chalk Pen--best thing ever.  I finished it up by running a piece of chalk all around the edges to make it "pop" a little more.
 • • •
My Mom's Pumpkin Patch
 Here are a few photos of my mom's pumpkin display too.  She did hers a bit differently because she painted a wood plaque to use as her base.  I love it!
 She used brown paper shreds as her base filler just to add a little dimension to the display.

 Another little chalkboard sign done the same way as above.  So cute!

 Her base is a wood plaque from the craft store and she used 2 colors of paint to achieve this look.  She first painted it dark brown and then added a light brown on top and then did lots of sanding to get most the light brown off and bring out the deeper brown.  She then waxed it and it feels like glass it is so smooth.  It turned out so well!

I love how they are the same but slightly different.  At first glance I think they look exactly the same but then when you really look there are little things here and there that we chose to do a bit differently and I love that.
• • •
 Such a fun Fall Project!  Something that would really make a great gift as well.
 Happy Fall!
 A cute little pumpkin patch!
  If you end up making these I'd love to hear from you.  I think you will just love them when they are all finished!

Friday, October 10, 2014

. . . Step Ladder Makeover with American Decor Chalky Finish Paint . . .

Don't you just love fall!?  I know I do!  It is my very favorite season...pumpkins, the leaves changing colors, cool mornings, breezy days, that crisp air that promises another beautiful fall day.  I Love It!

I always get an assortment of gourds, pumpkins and marigolds for my front porch the minute I feel fall in the air.  Last year I added the flowers and pumpkins to a little step ladder my mom gave me that was all beat up and old as the hills.  I loved it and it got a lot of compliments when people stopped by so I knew I'd be using it again this year.  

When I was pulling the little ladder out I thought it looked like it was crying out for a little color.  I just happened to have some American Decor Chalky Finish Paint from Deco Art that I was dying to try.  I figured this ladder was the perfect piece for chalk paint. This was such a quick project and the paint is the bomb diggity!  


 If you haven't used Chalk Paint then I highly recommend this American Decor Chalky Finish Paint! It goes on so smoothly and you get a great feel when it dries.  Use some wax with it and you have a gorgeous finished piece.

 For my ladder I wanted the finished look to be "worn" out looking.  I knew I was going to be using at least 2 colors but as it turns out I ended up doing 3 different colors and I love how the finished product looks.


 For the first coat I used a light coat of the Vintage color.  I didn't do it real heavy but I got the wood mostly covered with this light aqua color.

 As you can see there is some of the wood still showing through so if you want this kind of look don't do a heavy coat of paint because you'll be adding more.

 For my next coat of paint I mixed equal parts of Vintage and Treasure.  As you can see it's what is in the little container above the paint.  I just dry brushed this on over the ladder but very lightly so it didn't add too much color.  I just wanted the color to deepen a bit.

 For the last step I used just the Treasure color.  This is a darker/brighter color by itself so I was very careful about how much I used.

 I really didn't want much of this brighter color to be on the ladder so what I did was just dab my brush in the paint and then blot it on a paper towel to take most of the paint back off and then went over the ladder in areas to add a pop of more intense color.  I liked that it absorbed better in some areas and not as well in others.  I joked when I was first doing it that I looked like I had a tie dyed ladder but once it dried it turned out perfectly!  I added a couple coats of wax to the ladder and lightly sanded it for a super smooth finish and I was done!  This literally took maybe an hour.
Using the three colors of paint really made this ladder "pop"!

It's the perfect pop of color for the front porch and it works well with my gourds and pumpkins.  

Wednesday, October 8, 2014

. . . Soda Carrier Treat Basket and Halloween Blog Hop . . .

I am super excited to be participating in the Delightfully Wicked Halloween Hop that Delightfully Noted puts on each Halloween.  When she asked me to do it I didn't need a second to think about it and pretty much knew immediately what I was going to share because it was already on my list of "to dos".  I am honored to be part of this great group of bloggers that are sharing projects today.  I hope you will stop by all their blogs and check everything out and be sure to share the links as well so no one misses out!

BE SURE TO CHECK OUT THE GIVEAWAY at the bottom of this post!  It's easy to enter and you never know...you might be the winner!
 

• • •
I am always trying to think of unique gifts that allow me to get crafty.  I also think that everyone likes to get a gift that you've put some effort into.  This originally started out as a teacher treat idea but we have 5 teachers this year and this was getting pretty pricey to do for 5 different teachers.  I decided that these were going to a few special people that I needed a little something for.  I also decided that I'd do a variation on it for teacher gifts.  

I also love a good printable so this allowed me to create this cute "Trick or Treat, Smell my feet, give me something good to eat" gift tag to share with all of YOU!  You can use this for all different treats and for all different people--coworkers, teachers, your child's classmates, Sunday school teachers, etc.  I am planning on doing the same idea but on a smaller scale for classmates and my son's teachers.  I think I'm going to just package the smaller version in cellophane bags and attach the tag with a cute piece of ribbon or baker's twine.  Easy peasy, don't you think?

You will need:
4 Pack soda carrier 
Spray paint or something to cover your carrier box in
Embellishments such as washi tape, ribbon, stickers, etc.  Most everything you see in my project came from Michael's.
Treat Tag that is available as a FREE download at the bottom of this post
I first filled the inner section of my box with tissue paper so the paint wouldn't get inside and then I covered the handle with tissue as well so that it could be left the orange stripe.

I then used cheap black spray paint and covered the entire box (including the bottom).  I used several light coats and let each dry before applying more because I wasn't sure if the cardboard would wrinkle if it got too wet.  Let the box dry completely.
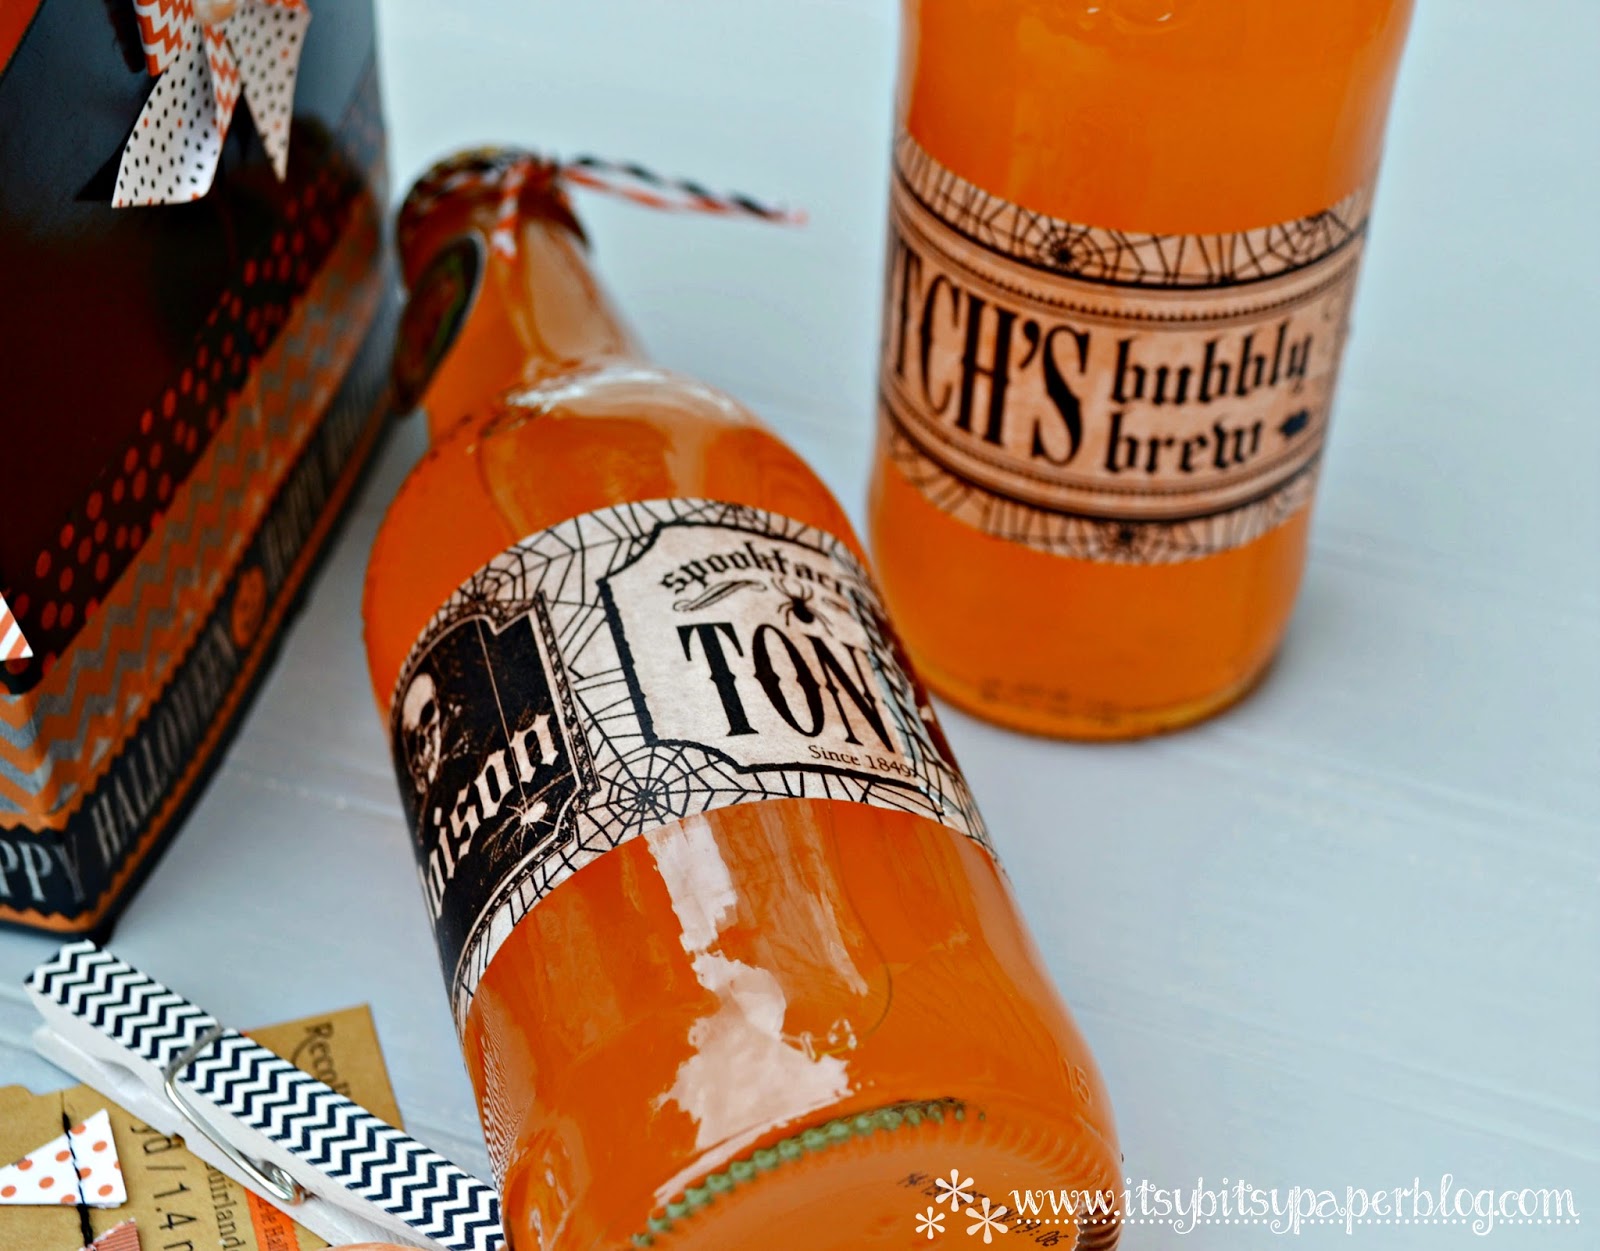
I removed the soda bottle labels with adhesive remover and then washed them with soap and water to get rid of any residue.  Once they were dry I used this awesome washi tape that came from Michael's.  It's all "drink" related so it was more than perfect for these bottles of soda.  I then added a single sticker to the top of the bottle and I added orange and black baker's twine right around the top of the bottle for an extra pop of color.

I then wrapped the top of the box with a piece of washi tap and added a cute sticker to the handle.  It's not very noticeable with all the treats in it but when they empty it out it looks more finished.  

I then used 3 different patterns of washi tape to wrap around the entire box.  This adds a nice pop of color as well.  The tape may not stick right if your paint isn't completely dry.
I filled my soda carrier with 2 bottles of soda and the 2 empty holes with lots of Halloween candy.  I also didn't like that the sucker label was so bright so I just covered it with a piece of washi tape and it fixed it perfectly!
I added a cute little paper banner by attaching it with glue dots.  This also came from Michael's.  I then printed and cut my treat tags and attached the tag with a cute black and white chevron clothespin.
 This project looks so cute and like it might have taken a lot of time but honestly other than the spray paint and removing the labels from the soda it was done in about 15 minutes at most.
The Trick or Treat Tag was designed by Itsy Bitsy Paper (yours truly).   The little witch feet graphic were provided by Doodles First.


 Lots of great Halloween treats are packed in this little soda carrier.  I was surprised at how much candy it took to fill the holes up.  If you were low on candy just fill the base of each "hole" with tissue paper or paper shreds and then it won't require so much.
 This is probably my favorite part of this whole project.  I was so excited when I saw this drink inspired washi tape at Michael's and knew I had to buy it but had no idea what I was going to do with it.  It was the perfect addition to this little project.  I am thinking that for the school teachers I'm going to use plastic bottles of orange soda and relabel them with this tape.  I don't trust my son to carry a bunch of glass into school!
Happy Halloween!
 This little Halloween treat tag just made for the perfect pop of color on the completed Soda Carrier.
  
The free treat tag printable is for personal use only!  Jut download and print on an 8.5x11 inch sheet of card stock and cut down to size.  Perfect!

Check out the entire Delightfully Wicked Halloween Hop below: