Showing posts with label decoart. Show all posts

Wednesday, March 23, 2016

DIY Drawer Planter

I love old drawers and have several around but I wanted to create something so off I went to Home Depot and found this great divided box already assembled and decided it would be perfect for a centerpiece filled with flowers or grass.

This can't be any simpler because the box is assembled and ready to be painted or stained and you just need one or two drawer pulls and you have a great little "drawer".

 I started off with my bare wood box which you can find at Home Depot in the aisle where they have their unfinished crates. 
 I stained my box with Minwax Dark Walnut wood stain and let it dry.  You could skip this step if you aren't planning on distressing your box at the end.
 Once the stain was dry I painted the box with DecoArt Chalky Finish paint in white.
 Once the paint was dry I fitted the sections of the box with some greenery I purchased from Michael's.  It was a "sheet" of greenery so I just cut it down to fit into each section.
 Then comes my favorite part!  Distressing...I sanded the box all over so that the stained wood would come through but if you don't want to do this step just skip it altogether which means you could skip the staining of the box at the beginning.
 After all the sanding was done I attached my glass knobs to the front of the "drawer".  I just love glass knobs and would have them all over my house if I could.
 Once the box was finished I used some galvanized garden stakes/tags I picked up at Michael's and added some vinyl numbers to them.  Just random numbers that have no meaning at all.  I then dry brushed black chalk paint onto them and wiped it off so that it created a distressed look instead of shiny metal.
 Once I was finished I added it to the center of my table for a centerpiece. 
 Can't get any easier than that!


 When you add your knobs to the front of the box be sure to measure making sure they are even on both sides.


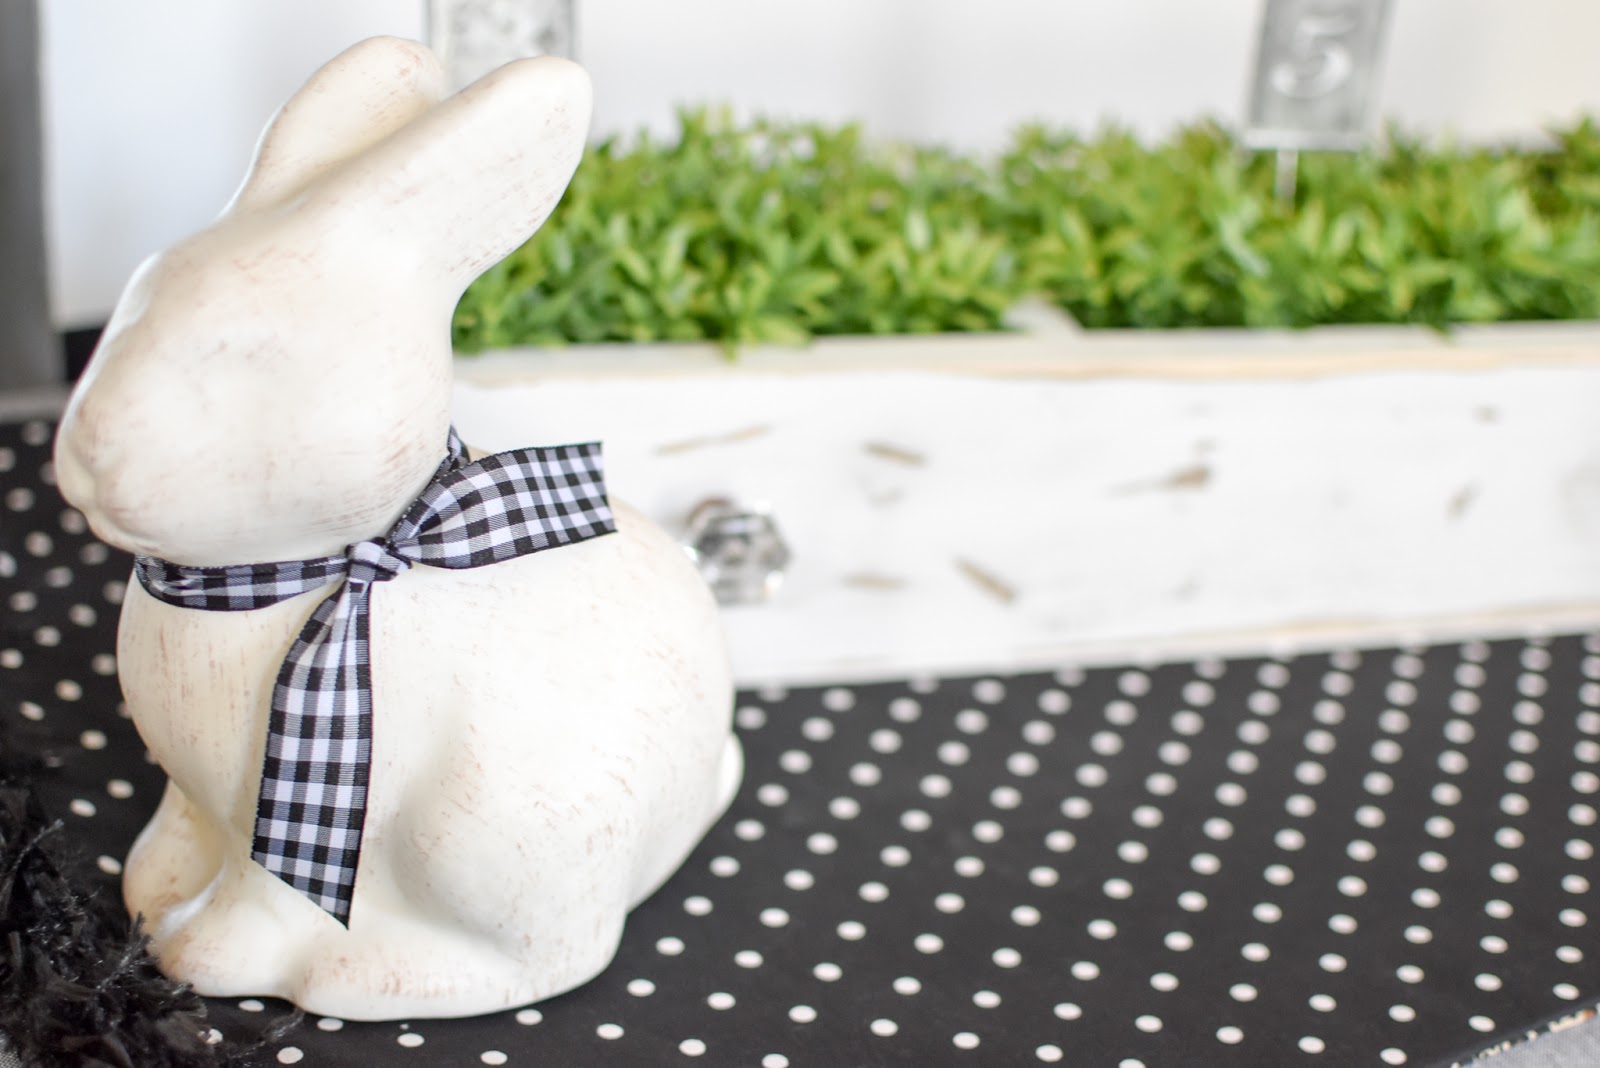
 I added a couple little bunnies to the table as well.
Easy Peasy!

Thursday, January 22, 2015

. . . Polka Dot Cake Carrier . . .

Several years ago I received this Cake Carrier and love it but everything looks cuter with polka dots so it was time to give this little baby a makeover. 

I decided to use Decoart American Multi-Surface Satin Paint in girly colors that are also perfect for Valentine's Day.  If you follow me on Instagram or Facebook you know Valentine's Day is on my mind so this cake carrier got covered in Valentine's Day colors too.  Really, I just look for any excuse to use Pink, Purple and Red in my decorating.
To make a Cake Carrier of your very own you will need:
Wilton Cake Carrier from Michael's
Decoart Americana Multi Surface Paint in the desired colors
Lots of ribbons or fabric scraps
Round Foam Pouncers or Stencils
*Patience


Americana Multi-Surface paint is available in Michaels. Visit the DecoArt Multi-Surface website for more crafting ideas and inspiration too. This little bottle of paint is perfect for so many surfaces!  You can use it on glass, wood, metal, fabric, most plastics and more.  It is for sure something you should keep in your crafting arsenal.  Check out their Metallic Colors too!

 To make the polka dots on the Cake Carrier the easiest way is to purchase these handy little Foam Pouncers from Martha Stewart Crafts at Michael's.  They come with multiple sizes in the package and they are great for making polka dots!  

Choose the size foam pouncer you want for your dots and "pounce" it in the paint color of your choice.  I usually dab it off a few times so I don't get any globs of paint on the item I'm painting.  Just gently press down to apply the paint in a perfect circle. 
  I used multiple sizes of these pouncers for this project.
 The nice thing about the foam pouncers is how easily they wash out and then just grab an old towel and dry them well and you can use them again immediately.  It is also very easy to realign them if they don't quite cover the first time.  For this project I did 2 coats of paint--I let the first coat dry and then went back and did a second coat and it was the perfect amount of paint.

 Once the Americana Multi Surface Paint dried it created the perfect look for this project.  I didn't want the circles to be too perfect or too dense in color so I really liked the coverage of this paint.  It was my first time using it but won't be my last.

 Once all the circles were dry I started cutting ribbon in about 6 inch pieces.  I used fairly thin ribbon but you could do this however you prefer.  Once all the ribbon was cut I started tying them onto the handle.  I didn't do any fancy knots...just a basic knot.  I squished my ribbons tight together so the handle was well covered and just alternated colors until it was completely covered.

 When the handle was complete I went back and cut the ribbons at different lengths.  Some were much shorter than others but that is what makes it fun!

  Once the ribbons are tied on and trimmed you are ready to fill the carrier up with cake or cupcakes!
 
 So cute and girly!

 Seriously, polka dots and ribbon make everything better!

 Of course I had to fill the carrier up with Valentine's Day Cupcakes too.  I cheated and ran to the store and got plain vanilla ones and then added my own cute heart sprinkles.

 This cake carrier would look so cute bringing your sweets to any function.

Be sure to follow Itsy Bisy Paper on 

Friday, October 10, 2014

. . . Step Ladder Makeover with American Decor Chalky Finish Paint . . .

Don't you just love fall!?  I know I do!  It is my very favorite season...pumpkins, the leaves changing colors, cool mornings, breezy days, that crisp air that promises another beautiful fall day.  I Love It!

I always get an assortment of gourds, pumpkins and marigolds for my front porch the minute I feel fall in the air.  Last year I added the flowers and pumpkins to a little step ladder my mom gave me that was all beat up and old as the hills.  I loved it and it got a lot of compliments when people stopped by so I knew I'd be using it again this year.  

When I was pulling the little ladder out I thought it looked like it was crying out for a little color.  I just happened to have some American Decor Chalky Finish Paint from Deco Art that I was dying to try.  I figured this ladder was the perfect piece for chalk paint. This was such a quick project and the paint is the bomb diggity!  


 If you haven't used Chalk Paint then I highly recommend this American Decor Chalky Finish Paint! It goes on so smoothly and you get a great feel when it dries.  Use some wax with it and you have a gorgeous finished piece.

 For my ladder I wanted the finished look to be "worn" out looking.  I knew I was going to be using at least 2 colors but as it turns out I ended up doing 3 different colors and I love how the finished product looks.


 For the first coat I used a light coat of the Vintage color.  I didn't do it real heavy but I got the wood mostly covered with this light aqua color.

 As you can see there is some of the wood still showing through so if you want this kind of look don't do a heavy coat of paint because you'll be adding more.

 For my next coat of paint I mixed equal parts of Vintage and Treasure.  As you can see it's what is in the little container above the paint.  I just dry brushed this on over the ladder but very lightly so it didn't add too much color.  I just wanted the color to deepen a bit.

 For the last step I used just the Treasure color.  This is a darker/brighter color by itself so I was very careful about how much I used.

 I really didn't want much of this brighter color to be on the ladder so what I did was just dab my brush in the paint and then blot it on a paper towel to take most of the paint back off and then went over the ladder in areas to add a pop of more intense color.  I liked that it absorbed better in some areas and not as well in others.  I joked when I was first doing it that I looked like I had a tie dyed ladder but once it dried it turned out perfectly!  I added a couple coats of wax to the ladder and lightly sanded it for a super smooth finish and I was done!  This literally took maybe an hour.
Using the three colors of paint really made this ladder "pop"!

It's the perfect pop of color for the front porch and it works well with my gourds and pumpkins.