Showing posts with label do it yourself. Show all posts

Tuesday, March 15, 2022

Wooden Bunny DIY

 If you aren't following along on Instagram what are you even doing?😂 Please join me so you can see my latest DIY, craft, recipes and more!  @paperpaintandpine

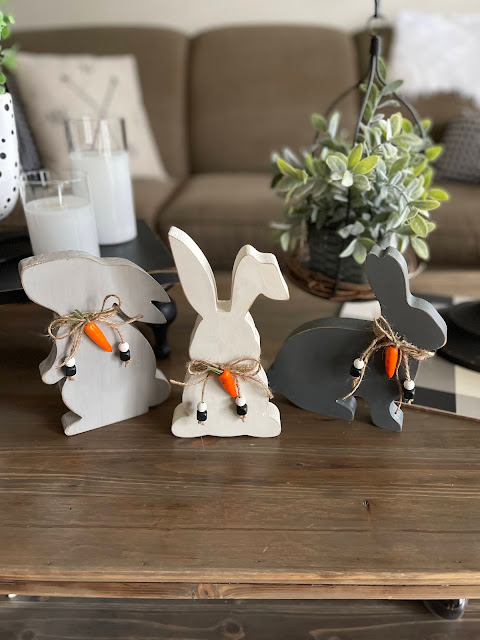
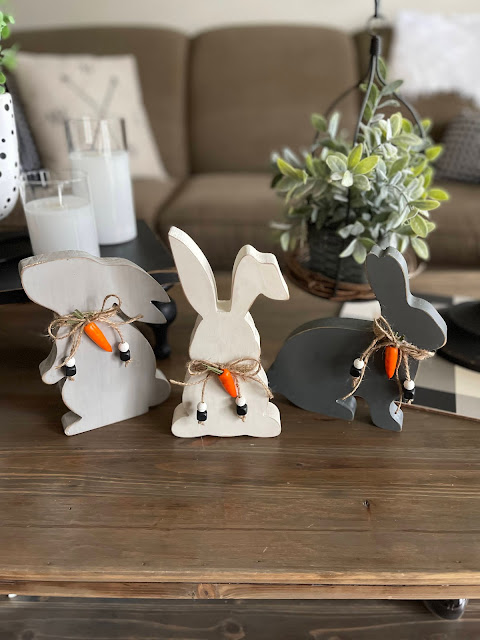
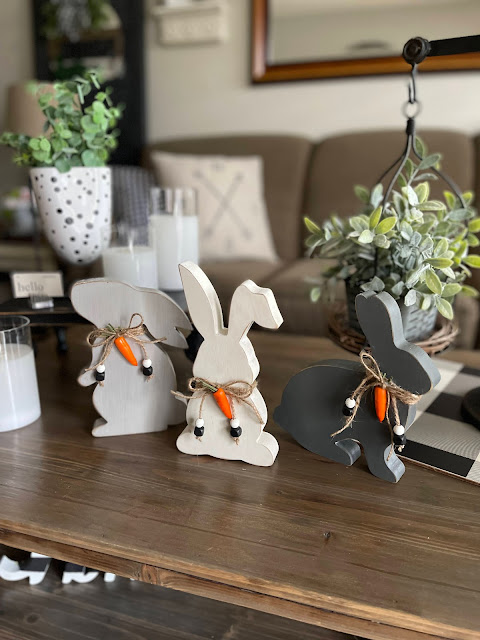
I was in Target and saw these adorable wood bunnies for just $5.00 a piece and they had three styles so I immediately started thinking of all the ways I could make them adorable but settled on neutral paint and absolutely love them!  You could certainly do so much more than just paint them a solid color but for me I wanted them to just blend in and be simple and sweet.  Such a fun and easy little makeover!

I simply sanded each bunny lightly to smooth the edges and then chose three colors of paint which ended up being white, light gray and charcoal gray.  I let them dry then sanded them lightly so reveal some of the wood and then coated them in Special Walnut wood stain to give them an aged look.  I then painted some little beads to coordinate with the bunny colors and then put those on a strand of twine and tied it around each bunny and then added a cute little carrot that came from floral picks at Michael's.

Aren't they just the cutest little things!?
So easy to make them over and they are still available at Target!  
If you want to purchase them click HERE.

I also have found several items on Amazon that would work for this project as well:
Another wooden bunny option

Sunday, March 18, 2018

Do It Yourself Faux Robin's Eggs

Oh where has the time gone?  I feel sad that I haven't blogged in such a long time but also I feel like so much work goes into blogging and sometimes I wonder if anyone is reading because most the time I get very little response to my posts.  That all being said I miss sharing my creative adventures with you.  I thought I'd kick off with a super simple project for spring or Easter.

I know a lot of places are carrying solid wood eggs or even just white plastic eggs and either would work for this project.  I used solid wood eggs from Target.  I found them in the dollar spot so you can't beat the price. I then bought a bottle of acrylic paint from Target in a color called Robins Egg.  Perfect name for this project.

 Perfect for your spring decor!

I picked up this brush at Lowe's Home Improvement and love it for anything that is round like finials or beads or candle sticks...you get the idea.  Makes brushing paint onto round object so much easier!

I painted all the wooden eggs with 2 coats of the acrylic paint and let them dry well before I started adding the spots that a typical Robin's Eggs have on them.

These are perfect just with the plain paint on them too so feel free to stop at this step!
Just start lightly dabbing the paint on with your toothpick.  I went through a couple toothpicks because they would flatten out and the spots got too big but that is fine if you like that look.

Don't worry if all the dots aren't the same size or if they get a little smeared. They don't have to be perfect because in nature they wouldn't be perfect either.  That is it!

Put them back in the cardboard holder or a cute egg basket and you are all set with another cute decor item for spring!

 Don't mind the large black TV behind this little vignette...it just happens to be where I needed to add a little something to spring this area up.

  Happy Spring my friends!


Don't you love a quick and simple DIY?  I know I sure do! 


Tuesday, January 3, 2017

Faux Reindeer Antler DIY

I love that antlers are making such a big appearance in decorating but I'm not a fan of the idea of a real antler sitting around.  I know I might be odd but I just am not feeling having a body part of a live animal sitting in my house. I know that deer don't have to be harmed to get their antlers but it just creeps me out...call me strange.  I do however love the look antlers give to your decor so when I ran across these silver metallic floral pick antlers at Michael's I knew I had a craft project.  I picked these up before the holidays for around a dollar each so you really can't beat that!  With the popularity of antlers I would imagine that the craft stores will continue to carry some form of antler in floral department.
As you can see it's a pretty antler even in the silver but it's not the look I wanted.  
This was the look I was going for so that it'd look a bit more realistic so out came the spray paint and wood stain.  First I used pliers to remove the floral pick by tugging it out.  It was very easy to remove but if you can't get it off you could also cut it off right at the base of the antler.  It does leave a tiny hole so if you wanted to fill that just use a little filler there.  I didn't bother because I knew my antler would be displayed with things around it and you'd never see it anyway.
To achieve the look of a real antler I used Rustoleum Heirloom White spray paint.  This is a gorgeous off white and works well for so many projects.  I didn't cover the antler entirely so that some of the silver color still showed through a tiny bit.  It's really trial and error.  I have done at least 5 of these now and every one of them turns out slightly different which I love so just play around with the coverage.  Once the spray paint is covering your antler on all sides and it's dry you will now need to use some wood stain.
For my wood stain I used Minwax Espresso and Classic Gray.  Always make sure to shake the Classic Gray stain because all the pigment sinks to the bottom and without shaking it you will get little to no coverage.  I used an old tshirt and dipped it into the Espresso stain and quickly wiped it all over the antler.  I then wiped the bulk of it right back off.  I worked quickly so the stain wouldn't get too dark but if you don't work fast and need to redo it just add another layer of spray paint and try again.  Once the Espresso stain is wiped off I then did the same thing with the Classic Gray.  After I wiped the gray back off I then took my Espresso and dabbed it onto some of the raised areas of the antler so it would have tiny bits of dark spots and did a few areas in the Classic Gray stain as well.  I let it dry and that was it.
 I know it may not be a perfect match to a real antler but I was certainly pleased with how it turned out.  So pleased that I went on to make some for my mom and more for myself.  I loved that each one turned out differently so they are unique.
Even though these photos are from Christmas I will continue to use the antlers in my decorating long after the holidays. I hope you will take a chance and give this a try if you like the look of antlers in your decor.

Saturday, October 1, 2016

Painted Faux Pumpkins for Succulent Arrangement

 The other day I was cruising stalking Instagram which I tend to do and came across the prettiest faux pumpkins filled with succulents.  It was done by my friend Amy @cutertudor (go follow her!) and they looked awesome.  I had bought several cheap pumpkins at Walmart and had already started painting them and bought a bunch of inexpensive artificial flowers to fill them with but then when I saw her succulents that completely changed my mind about using the flowers. So flowers were out and I headed back to the store to spend a fortune on succulents.  Let me tell you these little picks aren't cheap!  I had 20 bucks in one pumpkin so this isn't the cheapest project if you are wanting to keep it from breaking the bank. Anyone has a source for inexpensive succulent picks I'm all over it so please share!

So armed with my succulents I went home and used Robin's Egg spray paint from Rustoleum to spray one of the pumpkins.  I have never used this color before but have fallen in love with it!  It's the prettiest light aqua!  For the second pumpkin I used Martha Stewart's Vintage Chalk Paint in the color Eucalyptus and brush painted it.  It takes a bit longer to brush it on but well worth it to use such a pretty color!
Once I had my pumpkins painted I then used my Minwax Furniture Paste which is my bestest friend for all paint projects.  I let it dry and then buffed it up and it left the prettiest finish and was so silky to the touch!
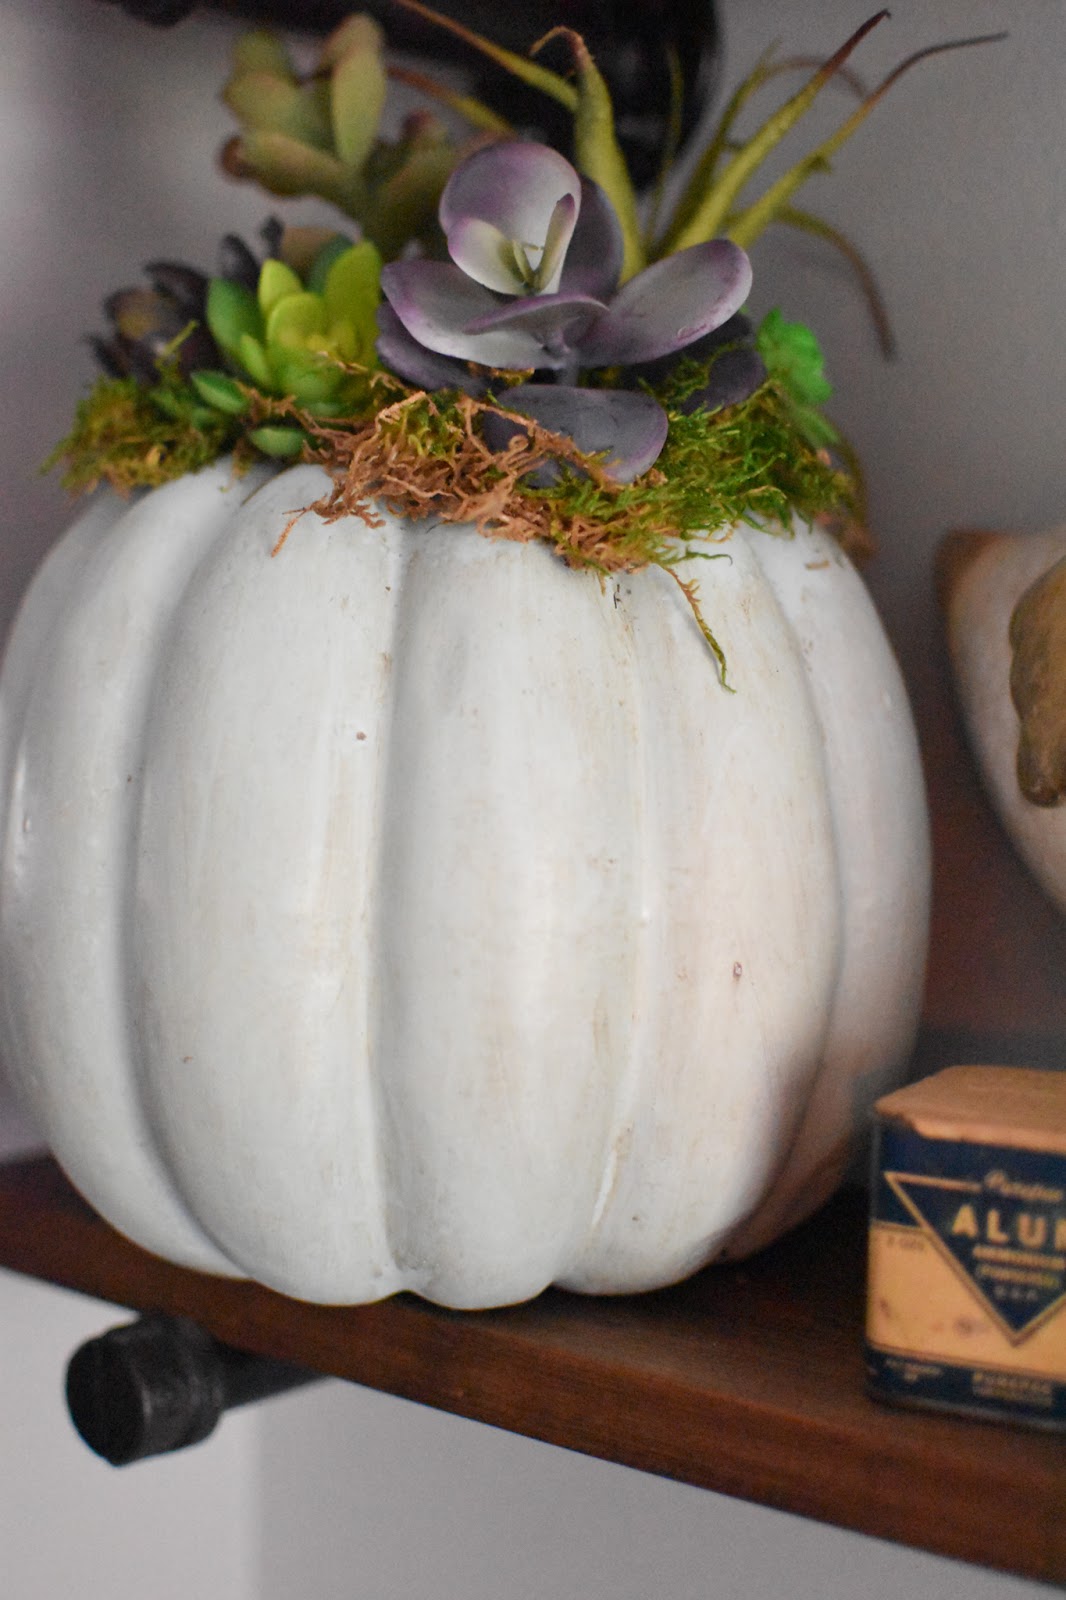
Now for the fun part!  I used a serrated knife and cut a small circle in the top of the pumpkin  and scooped out some of the styrofoam.  I would start with a samll circle because it's easier to make it bigger than to try to shrink it down after you made it too big.
Then I just started placing my succulent picks where I wanted them and of course because the inside of the pumpkin is styrofoam it's super simple to dig the sticks into it so they hole well.  Once you get those arranged just the way you want them you are just about finished.
I bought a package of sheet moss and just tore chunks of it off and placed it all around the top of the pumpkin,  In between the succulents and under the succulents etc.  Just place it anywhere you think it needs a little something extra.
Um, can you get any easier than that?  This project may not be the cheapest but it sure is a pretty one that makes it worth spending that money on the succulents!
 Here are a few photos of the finished pumpkins that I hope you will like!


 I ended up having one extra pumpkin leftover so I gave it a shot of the Robin's Egg Paint.
 I then hollowed out the hole at the top and added pieces of twine down along the grooves of the pumpkin just to give it a little interest.
  Then I filled the hole with chunks of the moss and placed a small candle in the center of it and then added a little more moss so it was visible from the top of the pumpkin.  Now it makes a pretty little glow at night when I light it.  Just don't ever leave it unattended!  A little disclaimer....I am not responsible for any damage done by following this tutorial. 

I hope you enjoyed this quick little project and would love to see yours if you make one.  This idea was based on @cutertudor's original Instagram post and she said she got the idea from Pinterest.  I have put my own twist on it so they may not look the exact same but the idea is similar for sure.  I think the next one I will make will be with the faux flowers I bought to originally do mine since I have so many of them.

Saturday, April 23, 2016

Do It Yourself Industrial Wooden Tray

I am a little into woodworking lately can you tell?  I made a mantle with my dad awhile back and I am unstoppable ever since.  I guess I got bitten by the woodworking bug. 

These little trays are fantastic to make with scrap wood.  Everything here came from my scrap pile and all were furring strips so even if you don't have wood scraps you will only have a couple bucks in a tray like this.  The most expensive thing about this tray was buying a can of black spray paint since I ran out of mine mid spray...grrr!
   To make your own simple tray you will need:
Scraps of wood-I used 1x3 inch furring strips and my tray is 18 inches long and 12 inches wide
Pocket Hole Jig or Wood Glue
Pocket hole screws
Drill
2 pieces of 4 inch plastic pipe in a 1/2 inch circumference.  I use plastic pipe in the underground sprinkler section and it's super cheap
1/2 inch galvanized clamps with screws
Black Spray paint
Saw or precut wood
Phillips head screwdriver 
 Start by deciding on how long and how wide you want your tray.  Once decided and wood is cut use your Pocket Hole Jig to drill a pocket hole on each end of the wood.  Always lay out your boards so you know which will need holes and which is top or bottom etc.  Once your holes are drilled use your pocket hole screws to attach the boards together.  Sand everything well and then flip it over and cut 2 small pieces the same width as your tray and attach those with a couple screws.  Since my boards are 1x3s I used 1 1/4 inch wood screws from the bottom of the tray into the little end pieces.  Whatever you do just be sure the screws won't come through the board.
  Once my tray was assembled I used Espresso wood stain by Minwax and let it dry well.  I then took my 2 4 inch pieces of pipe and sprayed them with the black spray paint.  Let that dry and then find the middle of your end boards and place them on there and wrap your 1/2 inch metal clamps around them and screw them into the board.  I used 1 inch #10 screws for this. When you add your clamps make sure your screw head is large enough to cover the hole in the clamp so it won't slip off. 
 This makes the perfect display tray.
After everything was assembled I used poly acrylic and coated the whole thing.  This helps with repelling dust and I highly recommend it!  I used a semi-gloss polyacrylic coating.  If you want a matte finish be sure to get satin in the polyacrylic.  I usually use satin but they were out when I went to pick up a new can so I just settled for the semi-gloss and it turned out that I liked it but not for all projects.
A very simple tray that doesn't look simple!  A perfect way to use up scrap wood.  I hope you love yours as much as I love mine!