Showing posts with label fall craft. Show all posts

Saturday, October 1, 2016

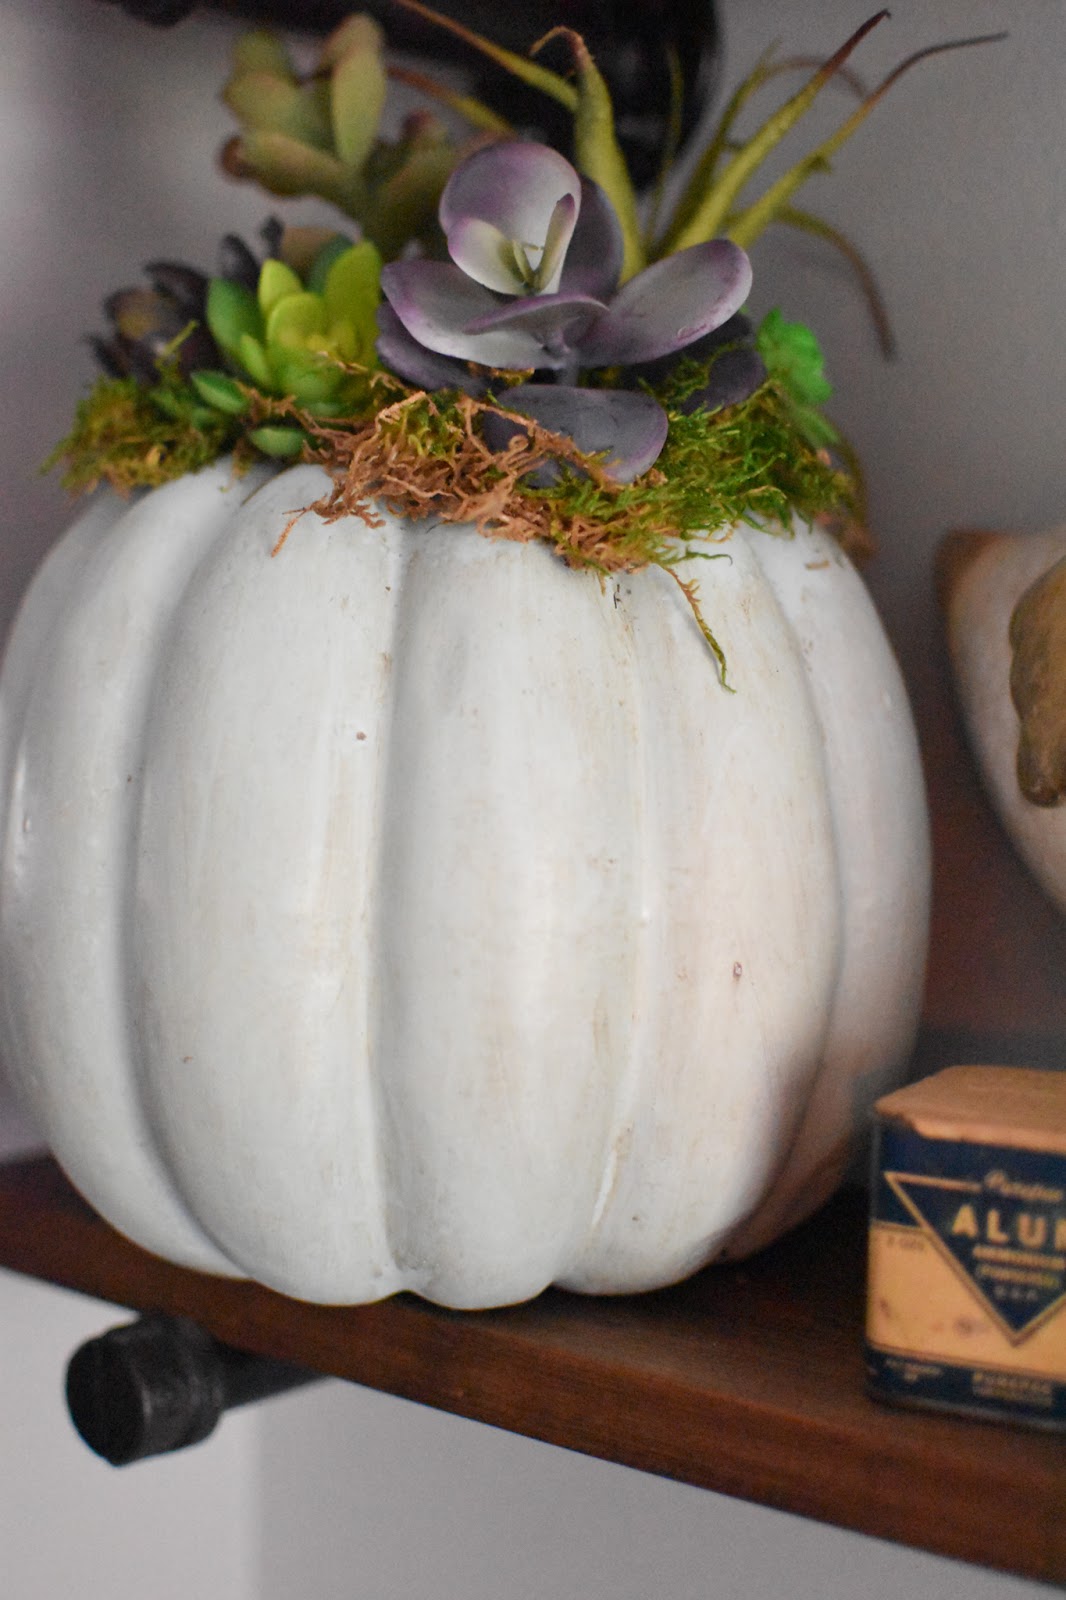
Painted Faux Pumpkins for Succulent Arrangement

 The other day I was cruising stalking Instagram which I tend to do and came across the prettiest faux pumpkins filled with succulents.  It was done by my friend Amy @cutertudor (go follow her!) and they looked awesome.  I had bought several cheap pumpkins at Walmart and had already started painting them and bought a bunch of inexpensive artificial flowers to fill them with but then when I saw her succulents that completely changed my mind about using the flowers. So flowers were out and I headed back to the store to spend a fortune on succulents.  Let me tell you these little picks aren't cheap!  I had 20 bucks in one pumpkin so this isn't the cheapest project if you are wanting to keep it from breaking the bank. Anyone has a source for inexpensive succulent picks I'm all over it so please share!

So armed with my succulents I went home and used Robin's Egg spray paint from Rustoleum to spray one of the pumpkins.  I have never used this color before but have fallen in love with it!  It's the prettiest light aqua!  For the second pumpkin I used Martha Stewart's Vintage Chalk Paint in the color Eucalyptus and brush painted it.  It takes a bit longer to brush it on but well worth it to use such a pretty color!
Once I had my pumpkins painted I then used my Minwax Furniture Paste which is my bestest friend for all paint projects.  I let it dry and then buffed it up and it left the prettiest finish and was so silky to the touch!
Now for the fun part!  I used a serrated knife and cut a small circle in the top of the pumpkin  and scooped out some of the styrofoam.  I would start with a samll circle because it's easier to make it bigger than to try to shrink it down after you made it too big.
Then I just started placing my succulent picks where I wanted them and of course because the inside of the pumpkin is styrofoam it's super simple to dig the sticks into it so they hole well.  Once you get those arranged just the way you want them you are just about finished.
I bought a package of sheet moss and just tore chunks of it off and placed it all around the top of the pumpkin,  In between the succulents and under the succulents etc.  Just place it anywhere you think it needs a little something extra.
Um, can you get any easier than that?  This project may not be the cheapest but it sure is a pretty one that makes it worth spending that money on the succulents!
 Here are a few photos of the finished pumpkins that I hope you will like!


 I ended up having one extra pumpkin leftover so I gave it a shot of the Robin's Egg Paint.
 I then hollowed out the hole at the top and added pieces of twine down along the grooves of the pumpkin just to give it a little interest.
  Then I filled the hole with chunks of the moss and placed a small candle in the center of it and then added a little more moss so it was visible from the top of the pumpkin.  Now it makes a pretty little glow at night when I light it.  Just don't ever leave it unattended!  A little disclaimer....I am not responsible for any damage done by following this tutorial. 

I hope you enjoyed this quick little project and would love to see yours if you make one.  This idea was based on @cutertudor's original Instagram post and she said she got the idea from Pinterest.  I have put my own twist on it so they may not look the exact same but the idea is similar for sure.  I think the next one I will make will be with the faux flowers I bought to originally do mine since I have so many of them.

Sunday, October 18, 2015

Knock if you Dare Halloween Yarn Wreath

Finally the weather is feeling like fall here in North Carolina!  I wasn't sure it was ever going to happen but the leaves are changing colors and starting to fall and the temps are getting chilly!  We even had to turn our heat on just this morning!  Yay!  It's my favorite time of year.  I love decorating for Halloween and Fall but this year I didn't feel like using any of the wreathes I've made in the past so I wanted to do something different.  

This was a total last minute decision because I was cleaning up some old craft supplies and found a ton of Halloween colored yarn and figured I would whip up a quick Yarn Wreath.  I also remembered I had this cute Knock if you Dare sign I had picked up at Home Goods last year on clearance for 2 bucks.  A little ribbon and it's done.  I realize it's not a very exciting wreath but simple and colorful made it work for me.

 If you've followed along with my blog over the years you know I love making yarn wreathes.  The best part is you can make them look different every single time depending on the yarn you use and the embellishments you add.  If you want to see a few of the others I have shared you can click here or here or even search my sidebar for yarn wreath for more.
 You will need:
Wreath form in the size and shape you would like for your wreath
Yarn--the more colors and texture the better in my opinion but for this one I used yellow, green, orange and two shades of purple
Floral pins
Flowers, plaque, ribbon or any other embellishments you'd like to add
 These floral pins are the bomb diggity!  I use them for just about every wreath I make and find they come in handy for lots of other projects too.  I buy them at Hobby Lobby or Michael's and try to always keep them on hand.
 Start with all your yarn lined up the same length and use the floral pin to hold the starting point of your yarn in place.  Make sure you pin it to the back side of the wreath so you can't see it.  Then just start wrapping the yarns around the wreath form.  I try to lay my yarns out "flat" instead of a big clump so that you can actually see all the colors.  You also want to pull the yarn very tight and keep it close together so your wreath form doesn't show through.  

You can also use several strands of the same color of yarn if you want a more dominant color to show up.  I wished I had used a couple strands of purple instead of just one of each shade but that's ok.  

After I finished wrapping the plain yarns I finished it off the same way I started it by pinning the yarn ends to the back side of the wreath with the floral pin.  I wasn't happy with the wreath because it didn't have any dimension so I took orange fluffy yarn and wrapped it around so it had a little extra oomph to it.  I didn't wrap it close together so it's spread out but you could either incorporate that fluffy yarn with the other yarns you used from the beginning or just add it after for a more subtle effect.
 I then took my sign and attached it with floral pins to the wreath.  You can barely see them so I didn't worry about hiding them but if you wanted to make them more concealed just cover them with a bit of yarn.
 I then took a wide piece of grosgrain ribbon and tied it to the sign to complete it. 
 Easy peasy and works perfectly for when the trick or treaters come around!
 Knock if you dare!