Showing posts with label craft. Show all posts

Friday, April 1, 2022

DIY Wood Bead Carrots

If you would like more ideas please follow along on Instagram!

I'm in full swing with spring crafting and I seem to have a thing for carrots this season!  Every year I feel like I get into a particular item and this year carrots are stealing my heart over an over.  This craft was fun and unique and so simple to do!

What you will need:
Orange Paint
Wood Beads in a variety of sizes
Wood Stain
Sand Paper
Twine
Ribbon
Cut Tag if you want to add one (watch video below of a great trick)
 
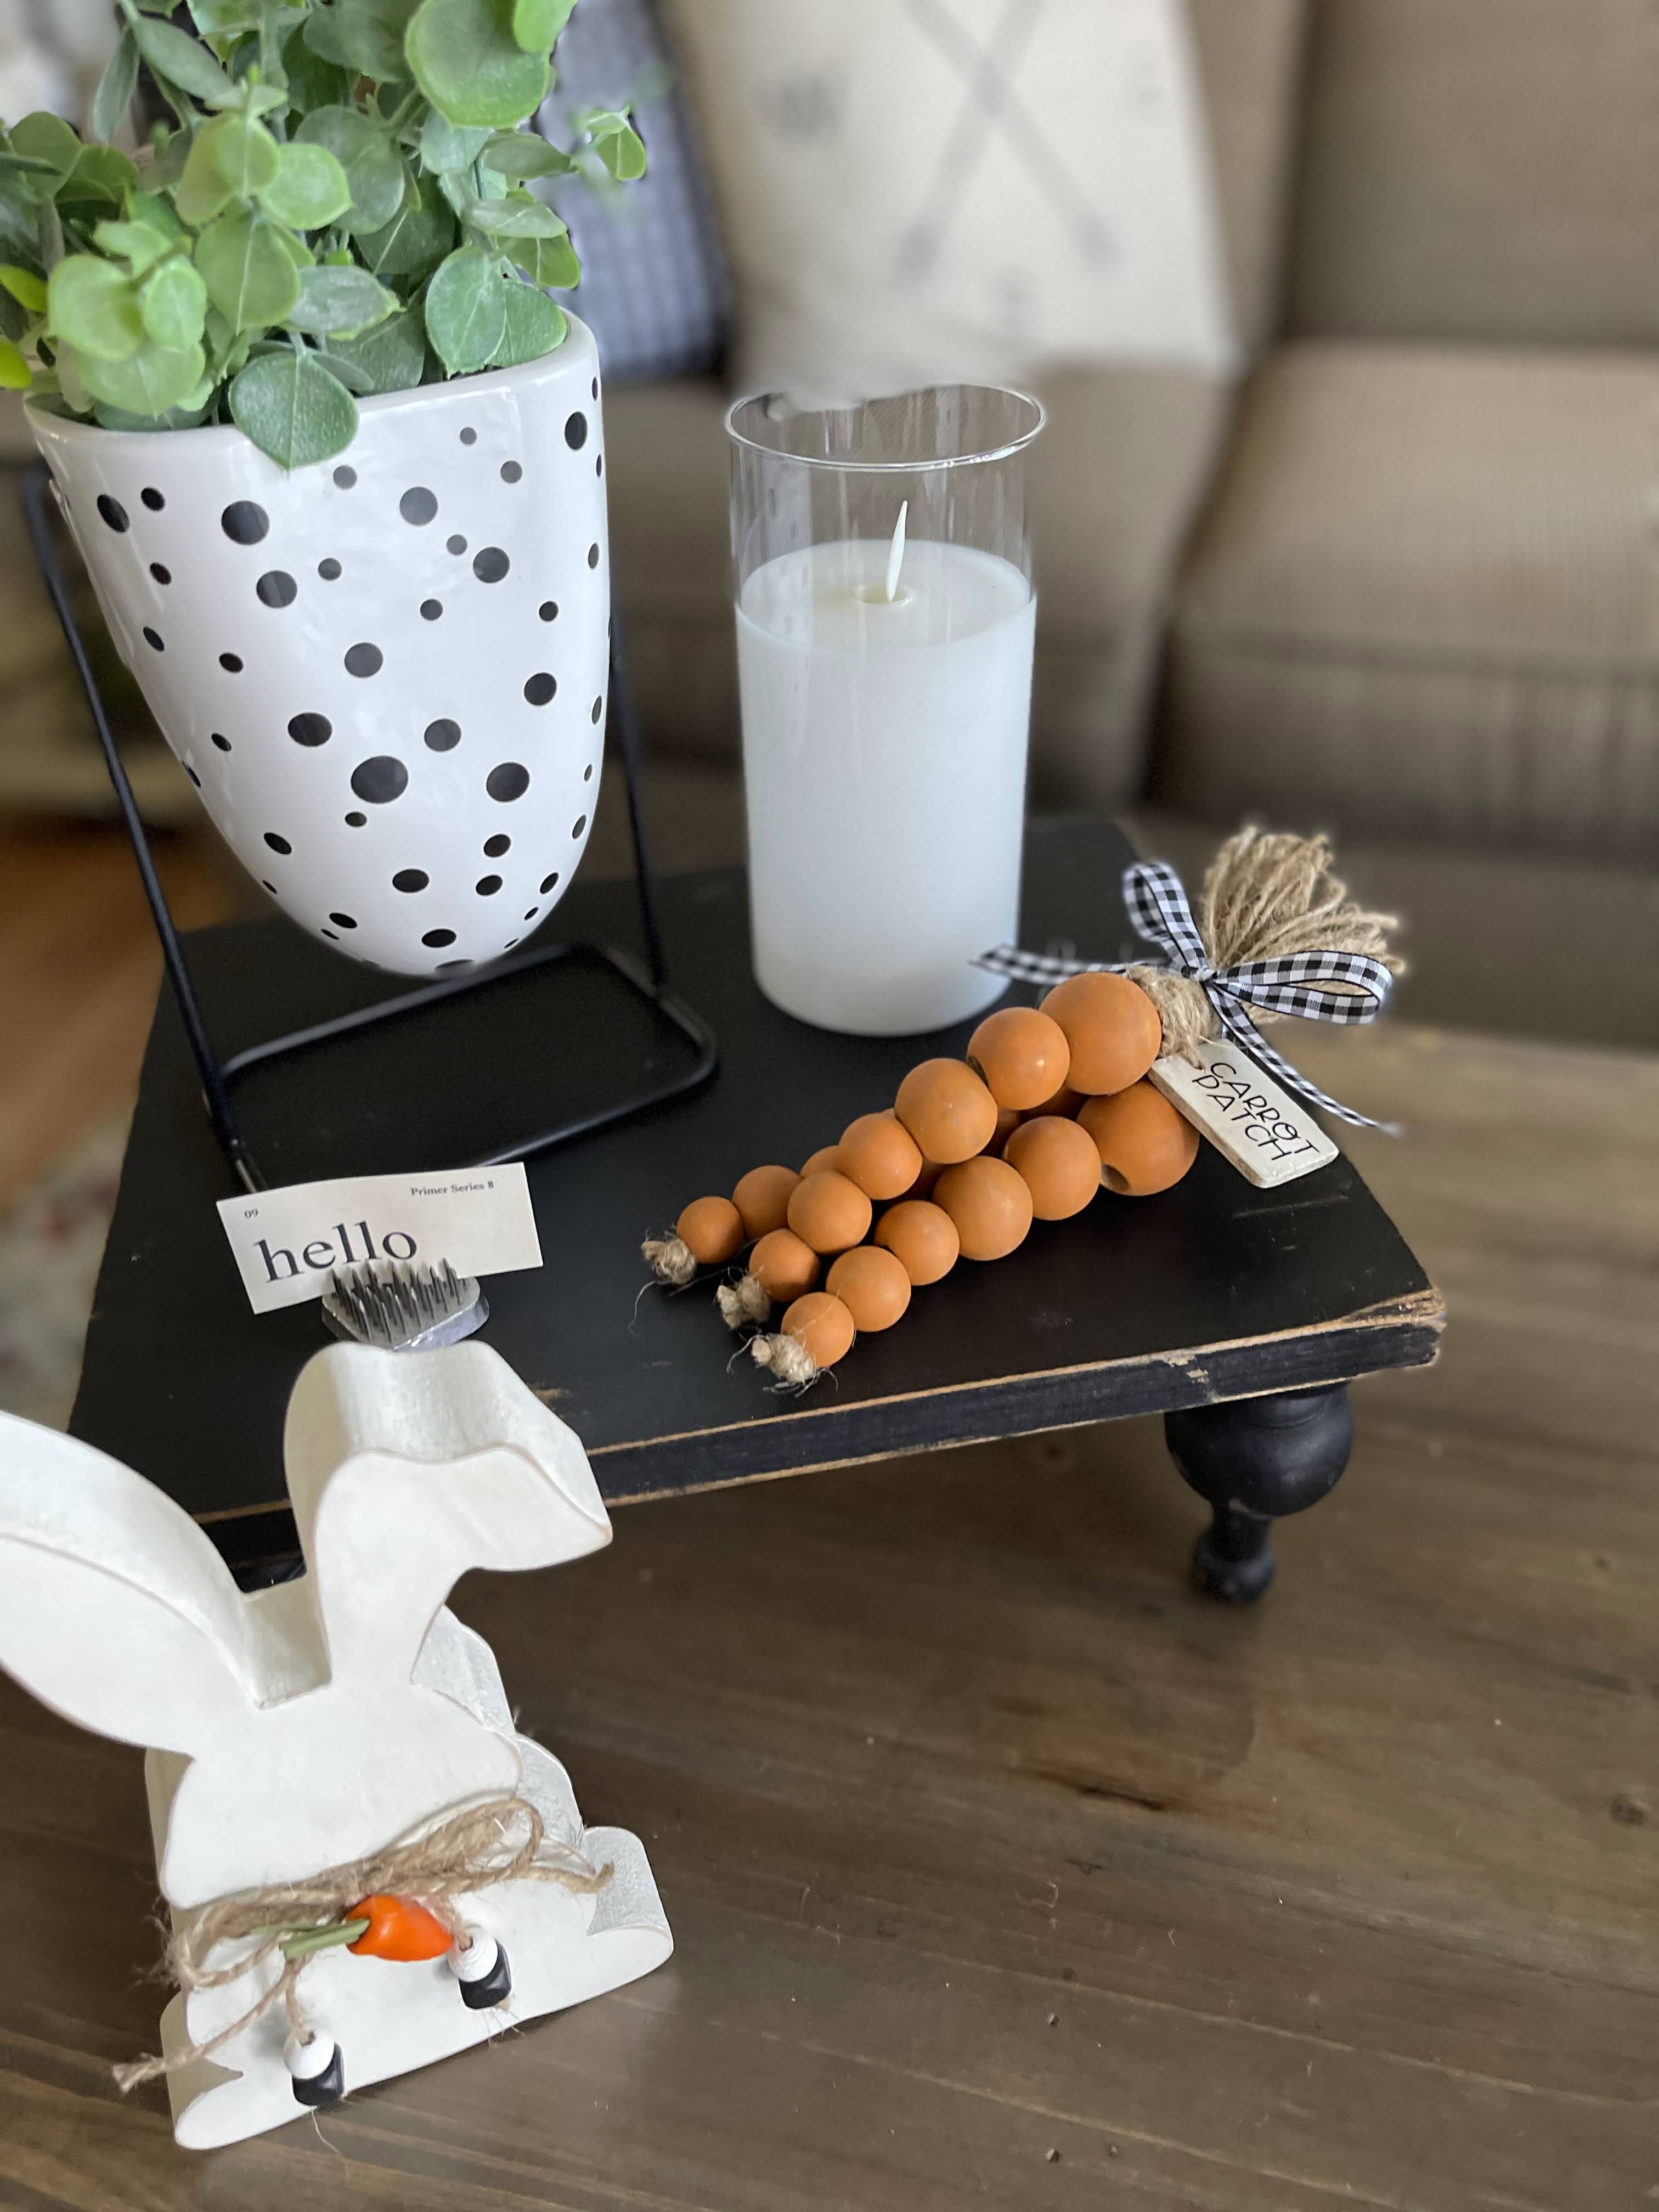
Start out by laying out your wood beads in graduating order from largest to smallest.  Once you have a "carrot" shape then put the beads on dowels and paint them orange.  Once my paint was dry I used my favorite little Micro Sander from Gator and lightly buffed each bead and then went over all of them with Dark Walnut wood stain to darken them just a bit.


After everything had dried I assembled my carrots by threading the beads on two strands of twine and tying a knot at the bottom making sure it was thick enough of a knot to prevent any beads from sliding off.  Once that was done I created twine tassels which I have been making for a long time but here is a great tutorial!  I then attached the twine tassel to the top of the carrots.  Once I had my three carrots assembled I took a strip of ribbon and tied it around the top and made a cute bow. 

As a bonus I did add a cute little tag I created using my Silhouette Cameo with some heat transfer vinyl.  I made the tag from a small piece of a paint stick and rounded the corners.  Easy as pie to do homemade tags that way!
A very simple project indeed!  I think they are fun and unique without a doubt but they add a nice pop of color to my decor.  I also love that you can make them your own but what shade of orange you use and what ribbon you want and even what color twine you choose!  Hope you make a set too!

Some supplies you might need:

Tuesday, March 15, 2022

Wooden Bunny DIY

 If you aren't following along on Instagram what are you even doing?😂 Please join me so you can see my latest DIY, craft, recipes and more!  @paperpaintandpine

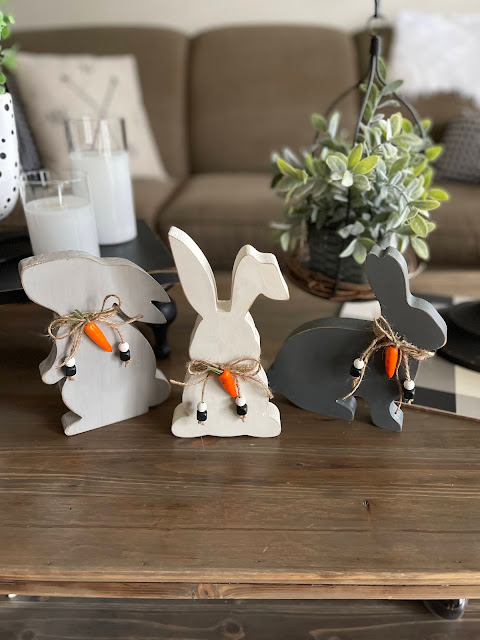
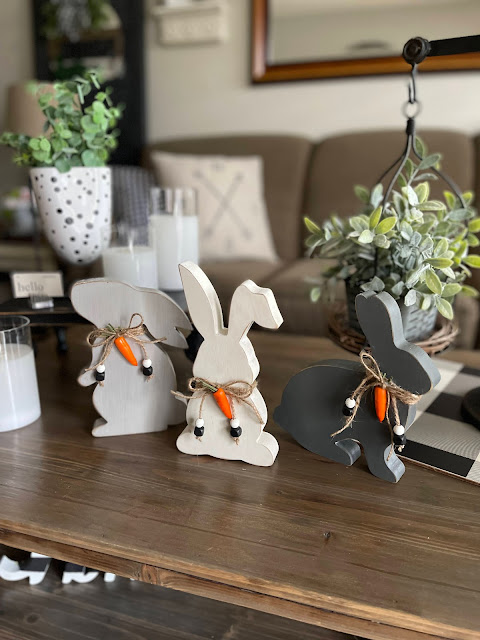
I was in Target and saw these adorable wood bunnies for just $5.00 a piece and they had three styles so I immediately started thinking of all the ways I could make them adorable but settled on neutral paint and absolutely love them!  You could certainly do so much more than just paint them a solid color but for me I wanted them to just blend in and be simple and sweet.  Such a fun and easy little makeover!

I simply sanded each bunny lightly to smooth the edges and then chose three colors of paint which ended up being white, light gray and charcoal gray.  I let them dry then sanded them lightly so reveal some of the wood and then coated them in Special Walnut wood stain to give them an aged look.  I then painted some little beads to coordinate with the bunny colors and then put those on a strand of twine and tied it around each bunny and then added a cute little carrot that came from floral picks at Michael's.

Aren't they just the cutest little things!?
So easy to make them over and they are still available at Target!  
If you want to purchase them click HERE.

I also have found several items on Amazon that would work for this project as well:
Another wooden bunny option

Saturday, October 1, 2016

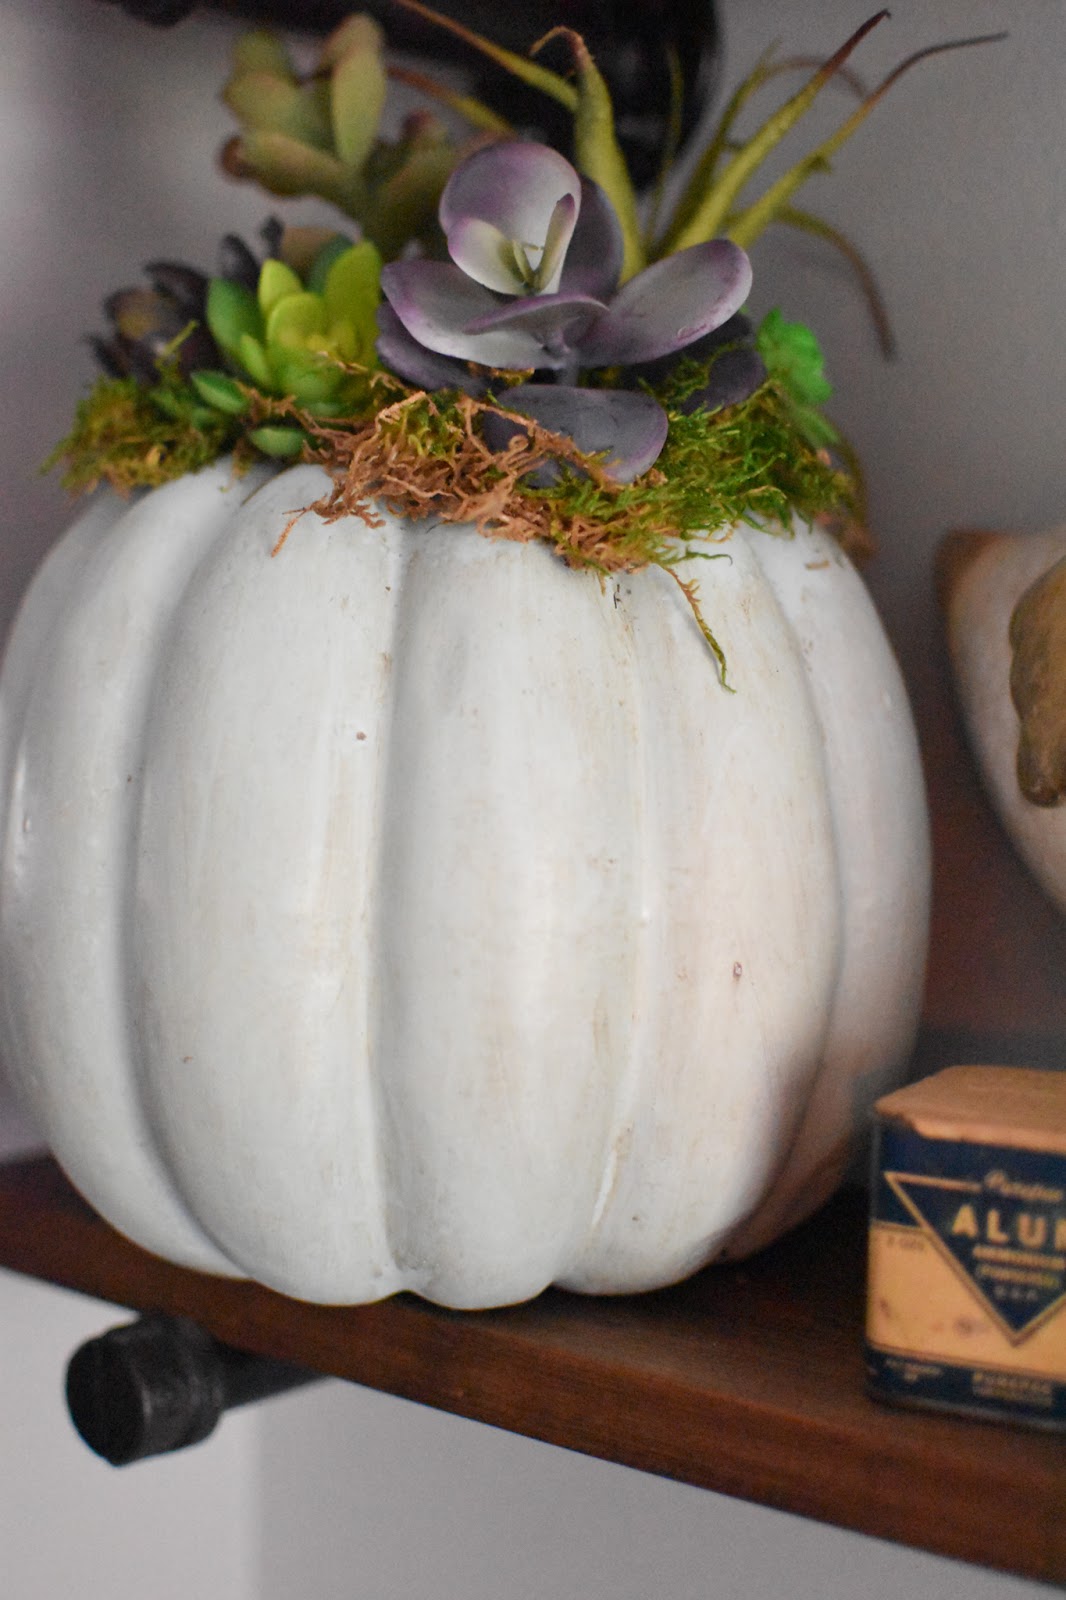
Painted Faux Pumpkins for Succulent Arrangement

 The other day I was cruising stalking Instagram which I tend to do and came across the prettiest faux pumpkins filled with succulents.  It was done by my friend Amy @cutertudor (go follow her!) and they looked awesome.  I had bought several cheap pumpkins at Walmart and had already started painting them and bought a bunch of inexpensive artificial flowers to fill them with but then when I saw her succulents that completely changed my mind about using the flowers. So flowers were out and I headed back to the store to spend a fortune on succulents.  Let me tell you these little picks aren't cheap!  I had 20 bucks in one pumpkin so this isn't the cheapest project if you are wanting to keep it from breaking the bank. Anyone has a source for inexpensive succulent picks I'm all over it so please share!

So armed with my succulents I went home and used Robin's Egg spray paint from Rustoleum to spray one of the pumpkins.  I have never used this color before but have fallen in love with it!  It's the prettiest light aqua!  For the second pumpkin I used Martha Stewart's Vintage Chalk Paint in the color Eucalyptus and brush painted it.  It takes a bit longer to brush it on but well worth it to use such a pretty color!
Once I had my pumpkins painted I then used my Minwax Furniture Paste which is my bestest friend for all paint projects.  I let it dry and then buffed it up and it left the prettiest finish and was so silky to the touch!
Now for the fun part!  I used a serrated knife and cut a small circle in the top of the pumpkin  and scooped out some of the styrofoam.  I would start with a samll circle because it's easier to make it bigger than to try to shrink it down after you made it too big.
Then I just started placing my succulent picks where I wanted them and of course because the inside of the pumpkin is styrofoam it's super simple to dig the sticks into it so they hole well.  Once you get those arranged just the way you want them you are just about finished.
I bought a package of sheet moss and just tore chunks of it off and placed it all around the top of the pumpkin,  In between the succulents and under the succulents etc.  Just place it anywhere you think it needs a little something extra.
Um, can you get any easier than that?  This project may not be the cheapest but it sure is a pretty one that makes it worth spending that money on the succulents!
 Here are a few photos of the finished pumpkins that I hope you will like!


 I ended up having one extra pumpkin leftover so I gave it a shot of the Robin's Egg Paint.
 I then hollowed out the hole at the top and added pieces of twine down along the grooves of the pumpkin just to give it a little interest.
  Then I filled the hole with chunks of the moss and placed a small candle in the center of it and then added a little more moss so it was visible from the top of the pumpkin.  Now it makes a pretty little glow at night when I light it.  Just don't ever leave it unattended!  A little disclaimer....I am not responsible for any damage done by following this tutorial. 

I hope you enjoyed this quick little project and would love to see yours if you make one.  This idea was based on @cutertudor's original Instagram post and she said she got the idea from Pinterest.  I have put my own twist on it so they may not look the exact same but the idea is similar for sure.  I think the next one I will make will be with the faux flowers I bought to originally do mine since I have so many of them.

Tuesday, March 15, 2016

Handpainted Wooden Fresh Eggs Sign

I know I'm not the only one a little over the moon for hand painted wooden signs because they are everywhere you look as of right now!  I have purchased several from great Etsy sellers and some from craft shows and even some mass produced ones from the craft and home decor stores but I had never tried my hand at one myself...until now!  
I started first by researching the best way to do the lettering on a sign and found tons, and I mean tons, of different techniques and believe me when I tell you I tried them all.  Nothing was a success for me until I used Carbon Paper.  Carbon Paper can also be like Charcoal Paper or Transfer Paper and I have even seen it as Tracing Paper.  I usually go mad until I figure out how to do something and this time was no different.  I tried the pencil transfer, the chalk transfer, the ball point pen transfer, the sharpie transfer and more and not one thing worked so if you would like to save yourself a step just buy your Carbon Paper before you begin.  If you have luck with the other methods I am thrilled for you but for me they just weren't successful.  I figure I will help you out by learning from my mistakes.  After the first 100 attempts weren't successful my son said to me..."Mom, do you know what the definition of insanity is?  It is doing the same thing over and over again expecting different results.  I think it's time to stop making yourself insane."  Oh how I love when he makes me laugh! 

In summary I think that this project is easy enough but it is time consuming and can be a little bit maddening until you get it right.  Since this sign I've made a couple more and even though it still is a little time consuming the process is a bit shorter and I'm able to paint just a smidgen faster.  If nothing else try one and say you did it because you will be so proud of yourself and then after that you can save yourself the headache and just buy the rest because that is certainly easier.
 You will need:
Scrap wood or plywood or mdf or craft wood etc. 
*I used plywood I had in my garage that had been beat up pretty bad but I loved how it turned out because of that.  The goal isn't necessarily to make the finished product perfect which is the beauty of this project.
Wood Stain or watered down paint
White Paint
Black Paint
Sandpaper
Painter's Tape
Pencil
Carbon Paper
Template you print
Paint brushes
Angled Artist's Brushes
Sharpie
Wood Wax 
Old rags

*  I started by using my hand sander and sanded the heck out of my plywood piece because I had used it as a base for painting things in the past so it had lots of paint on it and not only that I hate the feel of plywood until it's sanded way way down. 
*  For the large sign I used watered down Charcoal Gray Chalk Paint as a "stain" so that dark color would show through when I distressed it later.  I have since made signs using black and gray wood stain and love how those turn out too so whatever your preference.  If you are painting your sign black with white lettering then use a whiter color as your base coat so that you'll have the lighter shade coming through the black.
TIP:  Make sure you wipe your board down with an old rag to keep it clean between each step.  The sanding process makes a mess of dust and even just wiping it quick with your hand will leave dust behind so just give it a wipe with a rag and if you still can't get all the dust off dampen the rag just a touch.
*  Once you let the stain layer dry give it a light sanding.  If you've used wood stain sometimes it can be a little oily so your paint may not stick as well without roughing it up a bit.

*   Paint your board the color you want.  I chose white and used chalk paint for this whole project.  I did 2 coats of paint to cover the dark base coat but I didn't want to have it completely covered so the 2 coats were perfect....darker than a white wash but not quite full coverage but again this will be up to you.
TIP for painting your board on a tabletop without getting paint on the table---use a couple sanding blocks to put under your board so it is raised up and then you can paint all the edges without dragging the brush on the table.  If you don't have sanding blocks pick something that you can use that is about the same height and place it under the two ends to stabilize your board.  I use the sanding blocks because I always have them out when I'm painting and because their roughness serves as a "gripper" for the board.  Makes edges a breeze!

*  Once the paint had dried I very lightly sanded the board down.  I did go heavier over the edges during this step so I could get the weathered/chippy look to my board but in the space where I knew I'd be painting my words I just lightly sanded

* This step is where your printer comes in....Create a document the size of your board in one of your graphics or word processing programs.  For mine I used Publisher because it's simple and sweet but you should be able to use quite a few different programs.  I typed in my letters and adjusted the height and width of them so I liked their appearance.  For your first rodeo you might want to stick with very basic wide block letters because it is much easier to trace and paint this style but if you are ready to live on the edge go for broke and do a script style.  Once you have your wording the way you want it click on print.  Unless you are doing a small sign you will get quite a few pages of text and may have to work with them like a puzzle and use Painter's Tape to put the template together.  For this sign each word printed on a sheet of paper so it was uber easy but on my long signs it was for sure a puzzle to get them together.

*  Once you have your template set up you will need to measure your board for the center both vertically and horizontally and then figure the same thing out on your template.  For this sign I taped my words together and then folded them in half both vertically and horizontally and found my "center" that way and then placed the wording template right in the center of my board.  I hope this makes sense because I didn't get a photo of this step.  Once you place the template put a piece of Painter's Tape at the top to secure it into place then lift the bottom edge of the template up and slide your carbon paper under it to start doing the tracing.
*  After you place your carbon paper just use a pencil to start tracing your letters.  I thought I would have to push really hard and as it turns out you don't.  After doing the first word pushing with all my might and my wrist and hand cramping I realized I only needed to use average pressure.
*  Now that your letters are all traced out you are ready to hand paint them!  This is not going to be fun without angled artist's brushes so do yourself a solid and get them before you start.  I always keep lots of small brushes that are angled and flat headed for my touch up work so I just grabbed a few of the smaller ones and got to work.  Slow and steady wins the race here peeps!  It won't make you happy if you rush.  I have a really steady hand and rarely use tape when painting because I can keep a steady line and even I had a few ton of little slips outside the line of the letters.  Since this project I have gotten better but I don't think I could have done it without the angled brush.

*  Pat yourself on the back for getting those letters painted and don't panic if they look a little whoppycocked!  It is ok...grab your black sharpie and go back around each letter to straighten out the lines and make them a little more uniform.  If you just don't care and like them looking a bit wonky that is ok too.  Just remember you don't need them to be perfect because you are going to sand the heck out of them.
*  Now is my favorite part because I love distressing!  I used both a rough sanding block and a smooth sanding block as well as my power sander to achieve the look I wanted.  I started out with the finest sanding block and lightly went over the whole thing.  I then started with the rougher block and went over the whole board again using more pressure in areas I wanted more distressing.  After I got the look I wanted that way I used my hand sander and really gave it a whirl with a smooth sandpaper.  Again just go a little rougher over the areas you want more distressed like the corners or edges.  After all the sanding I then grabbed my hammer and my paint can opener and started adding a few gouges into the wood.  You can do this lightly or really take your aggression out on it or just skip this step if you are taking baby steps into the distressing.  After I was happy with all my scratches and dents I wiped the board clean and got ready for yet another step.  Seems never ending I know but it all goes pretty quick.
*  For me I wanted my sign to still look a bit older even after all the distressing I did so I used a black wood stain and very very lightly dabbed it on and smeared it around and immediately wiped it back off.  I went in the direction of the grain but you can do it however you like.  I covered the whole board but went a bit darker in certain areas.  If you want to skip this step you can but it does make the sign look a bit more weathered which is how I wanted mine to look.  A personal choice on this step.  Get ready for the final step.
*  Wax on...Wax off--this step makes for a beautifully finished sign both to the look and the touch!  I use Minwax Wood Wax for this and I adore it.  I've used other products and this one is my favorite!  I use it to finish almost every paint project I do because I love the finish.  For this step use an old rag or a wax brush and apply your wax all over the board including the edges.  I just rub it on until it's fully covered and let it dry for a bit and then take a clean rag and just buff it a little by using some pressure and scrubbing over the surface until it's buttery smooth without any stickiness.  If you feel a few tacky spots just give her a buff again and if that doesn't make it smooth it might be that your wax hasn't dried completely so try again in a few minutes.
That is it folks!  You did it and now can proudly hang or prop your sign for all to admire.
Phew...I know this was a long post and for that I'm sorry but I hope that all the steps made your sign making a bit easier!


Tuesday, December 22, 2015

Pom Pom Tree Garland

When out shopping for the holidays I saw this beautiful pom pom garland at Pottery Barn but it was all white and my tree is flocked so the white blends in too much.  But, it got me thinking about how easy it would be to make my own!  
 This is a very easy project that anyone can do if you can thread a needle.
You will need:
Lots and lots of pom poms in any color you’d like
Clear beading line or a heavy clear thread.  I used Beadalon
Sharp Needle
Beads in any color and size you’d like just make sure your needle will fit through the opening
Lots of time!
*All the supplies for mine came from Hobby Lobby
Thread your need and just start adding the pom poms and beads in any pattern you’d like.  It doesn’t all have to be uniform like mine is but I’m a matchy matchy type girl so of course mine needed to be a pattern so it all matched.
 I used clear, silver and pearl beads along with white/silver pom poms and red pom poms to create my garland and the metallic bits in the pom poms glitter beautifully with the tree lights on.
 The clear beads also help catch the light and make the garland shimmer.
 Other than being time consuming this project is super simple to create!
Merry Christmas!

Friday, November 20, 2015

DIY Christmas Ski Decoration

I know I'm not the only crafter that stalks the Dollar Spot at Target!  You will probably know all about these awesome skis they have right now in their bins and maybe even have some at your house. 
I actually passed these skis up numerous times because I just wasn't sure what I wanted to do with them even though I loved them.  I debated on painting them white and adding them to a pine wreath but I wasn't convinced that I loved that idea so I just kept walking by them.  Then I needed something to hang on my wall that wasn't too large but looked Christmasy so off I went back to the Dollar Spot to see what I could come up with.  The skis were added to my cart and I came right home to get a set made for my wall.  I loved them so much I made a second set and then made a bunch for gifts.  After getting about 12 extras done I'm all set for teacher gifts, neighbor gifts, family gifts etc.  You can never beat an inexpensive gift that looks like a million bucks!
 You will need:
Set of Skis from Target or anywhere you can find skis
Pine 
Berry picks like above or just berry garland you can cut into small pieces
Floral wire or floral tape
Ribbon 
 To make the skis a little dressier you will need to "clump" your berry pieces and pine pieces together and arrange them in the layout you want and wrap the "stems" with floral wire or tape so they stay together fairly well.  Cut a piece of ribbon long enough to wrap around the center of the skis and lay your berry arrangement on top of the skis and then tie a pretty knot around the skis and berries with your ribbon.  I never cut my ribbon from the spool until after I've tied it off so I don't waste any but once you do one you'll know about how much you need.
When you cut your ribbon be sure to cut it with sharp scissors and cut at an angle so it doesn't fray at all.  I used 2 inch wide Grosgrain but you could use wired ribbon or satin ribbon or twine etc.  I chose to skip a bow but you could certainly do a bow instead of the knotted ribbon.

I want to mention how amazing these Berry Picks are that are available from Target in their Christmas Section.  They work so well for wreathes or other diy projects.  They come in a box and you get a bunch!

My mom is planning a set of these using a poinsettia and a few bells along with some ribbon.  You could use most any pretty arrangement in the center of the skis.
 These skis come ready to hang but since I didn't want to make holes in my wall for just the holiday season I used 3M picture hanging removable tabs to hang mine and they are staying put perfectly without ruining my walls.  
 Easy gift for just about everyone and it doesn't break the bank!