Monday, April 30, 2012

. . . DIY Painted Knife Block . . .


I love my kitchen knives!  They are Wusthof Classic Ikon Crème and they are one of my favorite things in my kitchen.  The only drawback to these knives is the standard knife block that came with them.  Not so pretty!  Well, I decided it was time to give that ugly knife block a good coat of paint and dress it up a little. 

My kitchen walls are a plum purple and the accessories are purple and chartreuse.  Well, why not make the knife block match everything?  Yep, that is what I did.  I can promise you from experience that you will get a boatload of compliments on your Knife Block Makeover.  I hosted a party recently and probably could have taken orders from people wanting me to do theirs too.  Such a simple project that is a real head turner.

I used Ivy Leaf Gloss Spray Paint from Krylon, E6000 Glue, a wood medallion from the craft store and a great drawer knob from Hobby Lobby that tied it all in.

I do not use the steak knife slots in my block so it didn't bother me that the medallion covered up two of them.  This block has the Wusthof name on the front and I had to have a quick and easy way to cover it up or fill it in with wood filler.  I chose the decorative way since I don't care about those slots.  Even if the slots are something you use there is still space for 4 of them or you could use a smaller wood accent that still covered the brand name.

Bold!
 
Gather your supplies--sanding block, knife block, primer, spray paint, glue, wood medallion and drawer knob
Place the medallion or decorative accent of your choice where you want it on the block
Cover the entire back of the decoration with E6000 Glue and apply the wood piece where you want it.  Let it dry completely before painting 

  Use a good spray paint primer to cover the wood decoration and the knife block
It is worth doing the primer step even though it's tempting to skip over it
Once the primer has dried apply several thin coats of the spray paint of your choice.  As mentioned above I used Krylon Ivy Leaf in Gloss.  I love the shiny look to the finished block but you may prefer the satin finish.

  Once the painted block is completely dry you will be ready to add the drawer knob in the center of your wooden decorative piece
This knob had a screw attached but I used plyers and my brute strength and pulled it out. 
Cover the back of the knob with E6000 Glue and place right in the center of the wooden medallion
Stand the knife block upright so the knob doesn't slide.  Let the glue dry completely before use.

I would recommend sealing it with a clear polyurethane spray in the same finish as your paint (gloss or satin).  

 Bright!
 Fun!
 Love it!
Pretty!
Linking Here:  
Polly Want a Crafter

Friday, April 27, 2012

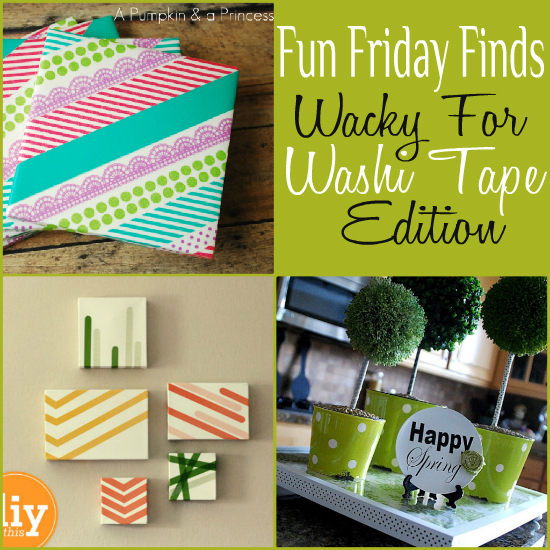
. . . Fun Friday Finds-Washi Tape Edition . . .


You guessed it...it’s Fun Friday Finds--Washi Tape Edition.  How could I not have a Washi Inspired collection today?  There are SO many amazing projects using Washi Tape but I had to narrow it down to a few of my favorites.  It wasn’t easy that is for sure!
 These are a few that I found to be really fun and creative!  I hope you’ll take a few minutes to check out these super crafty bloggers and their great project ideas.
  
Washi Tape Coasters @ A Pumpkin and A Princess 
Washi Tape Wall Art @ Sarah Hearts 
Washi Tape Serving Tray @ Tatertots and Jello


 Washi Tape Office Supply Cans @ The Crafted Sparrow 
Washi Tape Business Cards @ Ginger Snap Crafts 
Washi Tape Kitchen Clips @ My Sister's Suitcase 
Washi Tape Bangle Bracelets @ delicateCONSTRUCTION
 Washi Tape Window Treatments @ 36th Avenue
Washi Tape Tea Lights @ What Happened Next
Washi Tape Pillow Boxes @ The Gunny Sack
Washi Tape Chipboard Letter @ Live. Laugh. Rowe

Thursday, April 26, 2012

. . . Washi Tape Lamp Shade . . .


Well, we are more than halfway through Wacky for Washi Tape Week.  I swear I could just keep going and going with project ideas but I promise I won’t.  I don’t want to wear out my welcome with my readers.

Today I did a Washi Tape Lamp Shade.  I know that sounds a bit wacky but it turned out great and added that little something extra to my green bedside lights.  I love these super simple projects that pack a lot of punch.
   Love!
 
BEFORE
 All you need is a lamp shade and some Washi Tape and a few glue dots or a touch of fabric glue.  I just dusted my lamp shade really well so it was nice and clean and then started to run the tape right along the bottom edge.  Every few inches I put a glue dot directly on the tape to add a bit more hold.  I found it best to do each side of the shade with 1 piece of tape versus the entire shade with one piece.  It does make for a seam at each corner but it's super easy to match the pattern up so you'd never know there was a break in the tape.

  POP of COLOR
fun! fun!
washi  madness
 
Cheery!

Wednesday, April 25, 2012

. . . Washi Tape Necklaces . . .


Another day for Washi Tape projects and this one is a fun one!  

I love jewelry, I mean what girl doesn’t?  So I had to create something with Washi Tape that I could actually wear.  I did two pendents—one with a cheap pendent necklace I picked up in the dollar bin at Michael’s (remember it's getting covered up anyway so it doesn't matter what it looks like) and then one made with a Washer.   

You just need some tape pieces, something to stick it to that can be worn as a pendent and Glossy Accents Glue.  The Glossy Accents Glue is found at craft stores and it creates a pearly, acrylic coating.  It is addictive and a must have if you like making necklaces.  You will have to stay tuned to see a Washer Necklace Tutorial using Washers, Paper and Glossy Accents Glue.  You will love it!


Washi Tape Madness

•Gather up your washi tape, washers or pendent "frame", Glossy Accents, rhinestones if you want them and you are good to go
• The Glossy Accents will be your new best friend if you haven't used it before!
• I made the front of the cheap pendent the back for this project so I covered it with washi tape
• This pendent has a little "lip" on it so I cut the edge of the tape off and then used my nail to really get it stuck down in frame of the pendent

• After the back is completely covered flip it over and tear tape strips in the color you choose and tape them on the pendent.
• There doesn't have to be any pattern to this just do it as you want it
• After the pendent frame is covered on front and back take a strip of washi and cover the four edges.  You'll want super sharp scissors to trim right along the edge.
• Add a rhinestone where you want it and you are ready to use the Glossy Accents

r• Lay the pendent face up on a piece of plastic or something smooth so it will peal right off if the glue runs a little bit
• Cover the entire front of the pendent with the glue.  You will start at the edges first and work your way in.  If there are air bubbles that form take a pin and pop them at the very end.  Let it dry completely then you will flip it over and use the glue to cover the back side and the edges of the pendent.  Make sure you don't touch this while it's drying or you'll get clumps of glue on the pendent.  It will look very cloudy when you first put it on but now worries because it dries clear.
• Take a washer from the hardware store and cover the entire thing with Washi Tape pieces and cover it completely with the Glossy Accents glue and let it dry.

• When everything is dry you will have a really nice pearly finish that feels like acrylic.  The photo on the left shows the front side of the pendents and the photo on the right side shows the back side of the square pendent so you can see how it is covered in the tape as well.  Make sure if you cover the back side of the pendent that you also use the Glossy Accents on it.

  Great Teacher Gift
FUN & SIMPLE
Linking Here

Tuesday, April 24, 2012

. . . Cookie Time Tuesday-Coconut Butterscotch Crunch Cookies . . .


Day THREE of Wacky for Washi Tape Week!
 Today is also Cookie Time Tuesday so I had to do a double post showing you the cookie recipe and a great way to package cookies as a gift using Washi Tape. 
I just used 2 empty Kool Aid containers (these are actually the containers from the Wal Mart brand).  Once the containers were empty I stacked my cookies up inside (Each container held 7 cookies) and then added the lid and got to “Washi-ing”.  Super simple and super cute!!  These were a special treat for my son's teachers.  Everyone loves to get something "Just Because" and we are very fortunate to have amazing teachers this year so they deserve a treat!

On to the cookie portion...These are really yummy.  I made 2 batches because our house is divided on coconut so some have coconut in them and some do not.  Either way they are great!  This really wasn't any set recipe but more something I made up out of several just to use of some of the ingredients I had in the house.


Cookie Goodness
 
Print Recipe HERE
You will need:
1 Cup shortening
1 Cup sugar
1 Cup packed brown sugar
2 eggs
1 tsp. vanilla extract
2 Cups all purpose flour
1 tsp. baking soda
½ tsp. baking powder
½ tsp. salt
2 Cups quick cooking oats
2 Cups crisp rice cereal
1 Cup flaked coconut
1 Cup butterscotch chips (or any chip you may like)

Monday, April 23, 2012

. . . Washi Tape Serving Tray . . .


Another day of 
Wacky Washi Tape Week!
 I recently hosted a surprise birthday party for my Grandmother’s 85th Birthday.  I was busy running around getting everything ready the day of the party and just thought this little dollar store tray needed a bit more “oomph”.  Washi Tape to the rescue once again.

The tray got so many compliments and no one could believe it was just some tape added to it.  I added a piece of hot pink card stock in the bottom of the tray just to add a little something extra and it worked out great.

  • • •
 You will need a serving tray with raised edges.  I got mine in the dollar bins at Target.  Then grab the Washi Tape colors you want to use and that is it!

  All you will do is wrap your tray with the tape.  Because this one had handles cut out I just cut my tape off on either side of it so it made it look seamless.  I also made sure to cover the lip of the tray with washi tape.  This is really not a project you can screw up so go for it!


So Cute!
 
Fun!
 

Party Time!

linking here:

Sunday, April 22, 2012

. . . Washi Tape Candles . . .

 Washi Tape is one of my absolute favorite things to have in my crafting stash.  There are so many amazing colors and styles available and it always makes a package a little bit cuter.  I ship every Itsy Bitsy Paper order with a label and a piece or two of Washi Tape on the envelope and it adds a nice pop of color.

I always buy my Washi Tape from Etsy or Happy Tape but recently I was cruising the Target Office Supply section and what should appear?  WASHI TAPE!!  You can’t believe how fast all three color combos went into my cart!

I have recently completed several cute Washi Tape projects so I figured I would dedicate a week to Washi Tape.  These are all created by tape from Target and my Washi Tape already in my craft collection. 

Without further ado let's get set for  
Wacky For Washi Tape Week!!!


If you have done any fun projects using Washi Tape I hope you'll leave a link in the comment section.  Who knows, maybe we'll do a Linky Party if there are a lot of responses. 
• • • • •
Washi Tape Candles
 
This is one of the sets I picked up at Target.  They are in the Office Supply Aisle and they have quite a few options and plenty of other great products that compliment these designs-paperclips, rubber bands, etc.

 
 I know these are basically self explanatory but I'll tell you what I did...Grabbed a couple mismatched and old candles and just wrapped my tape around them until I covered the entire candle.

I then took my CutterBee Scissors to trim the excess tape that 
was at the very top of the candle.

  Springy and Fun!
• Easy peasy

***PLEASE USE AS DECORATION ONLY!  I don't want anyone telling me their washi tape candles caught on fire--that would be awful.  If you want them to be used as an actual burning candle then PLEASE use the battery operated candles.


Stay tuned for a fun Washi Tape Project everyday this week!  
Linking Here 
Tatertots and Jello