Showing posts with label mason jars. Show all posts

Saturday, October 10, 2015

Black and White Stripe Painted Mason Jars

If you follow me on Instagram (and you should!) you will know I have an obsession with Black and White stripes right now.  I just got done painting bold stripes on my family room walls in black and white, buying candles in black and white stripes and now painting mason jars in black and white stripes.  I'd say my obsession is alive and well! 
 I have tons of jars in my house and always keep a collection of spray paint on hand so for me this project was as easy as digging into my stash in the garage and setting up my spray paint station and having at it.  If you don't keep these things around here is what you will need:
2 colors of Spray Paint in the colors of your choice
Mason Jars in the brand of your choice
Painter's Tape
 
First you will want to spray paint the entire jar white.  I did 3 thin coats on my jars to cover them well.  It doesn't have to be perfect since you will be distressing them after but make sure the jar is mostly covered and not see through anymore.  

Once your base coat has dried completely you will need to tape off your stripes.  I didn't do this by measuring because I didn't want them to be perfect but if you prefer perfection more power to you!  My tape measure and I are on the outs after the stripe wall project so I figured imperfection was right up my alley on this project.  

I taped off my stripes by starting right under the rim of the jar and then added a small piece of tape between the stripes to know how far down I wanted to go (just make sure you remove this piece of tape before you start painting your black).  I got three stripes out of my jar using the basic painter's tape.  I know I'm probably not explaining this step very clearly.

Once your lines are taped off go ahead and spray the entire jar black.  Make sure you really seal the tape all around the edges before you start this step.  The above photo is actually after I had already painted the black stripes but didn't seal the tape edges so the black got on my white paint a little.  To fix this I just taped off the black stripes once they were dry and repainted the entire jar white and it worked perfectly to fix the imperfections and bleeds of black.

You can decide if you want your mason jars with or without the "writing" on them.  I wanted mine to have the writing so it created a little more interest but I've painted plenty that do not have the writing and they still look great after they are distressed.  It just depends on your plans for them.
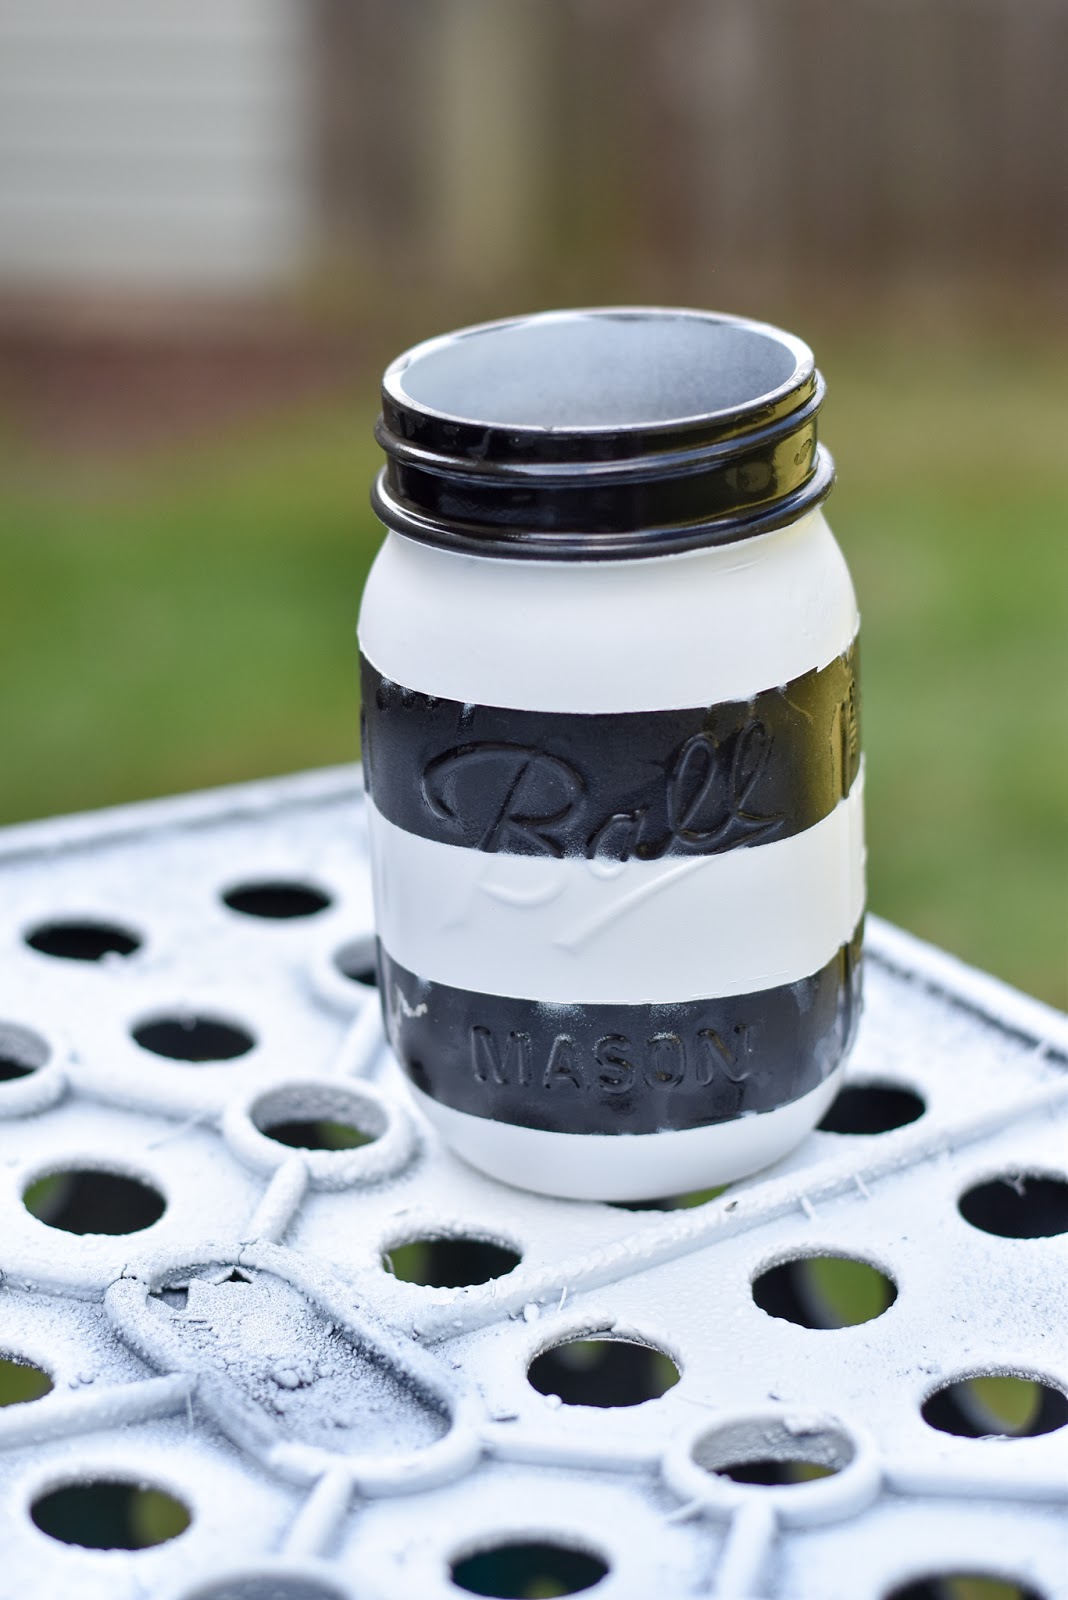
 When everything has dried remove the tape.  I found that letting my paint dry completely before removing the tape worked best.  It is hard for me to be that patient but I made myself do other things so I wouldn't be itching to remove the tape too soon.
 My Charley Girl had to oversee the painting project to make sure I was doing everything right.  She is quite the supervisor!
 Use a very fine grit sandpaper to sand the entire jar.  I went a little heavier over the raised writing but then went softer over the rest of the jar so I didn't actually remove the paint.
 As you can see the distressing masks all the imperfections anyway so don't worry about being perfect for this project.
 If there are areas that didn't get as distressed as you wanted just keep going over them with sandpaper.  I even had some actual chips in my jars but they just ended up adding to the look.  I was worried at first because I figured I'd have to repaint but it worked out in the end and I left the chips.
 I didn't paint lids for this project because I knew I was using my jars for flowers and I had black frog lids already.  If you don't have those or are using them for something else that requires a lid just spray paint it.  
*Frog lids are the wire lids that allow you to arrange flowers.  Sometimes they sell them just as Frog Lid Inserts but the ones I have are the whole lid and they are already black so it's a win win situation!
 I did three vases and added some flowers and a piece of ribbon to compliment the stripes.
Love an easy peasy spray paint project that actually turns out as well as I imagine it will!  
These would be great to fill with candy and give for Halloween Treats to someone special as well!  You could add a very cute Halloween tag and wrap the filled jar in clear cellophane and have fun and unique gift to give to teacher's or coworkers etc.  So many uses for Mason Jars!

Friday, February 13, 2015

Valentine's Day Painted Mason Jar Flower Arrangements

I'm breaking a blogger rule and posting this extremely last minute because I honestly forgot all about them.  Not good planning on my part!  I figure better late than never and these little Mason Jars would be a great decoration for any season even though I did mine with Valentine's Day in mind!  I made mine in a few hours and ready to go on my table to add a pop of color.

 You will need:
Chalky Finish Paint and of course my favorite is Americana Decor by Decoart
Paint Brush
Jars
Wax to protect them if you'd like
Embellishments of your choice.  I used paper doilies, felt hearts and Baker's Twine
Dollar Store flowers or any silk flower
Tray and tray filler if you'd like

 The most time consuming part of this project is painting the jars.  Just use your chalky finish paint and brush it on the outside of the jars and let it dry and do another coat.  I did 3 coats on mine to make sure they were well covered.  I then sanded them lightly and applied a coat of Wax from Americana Decor to finish them.

Now the fun part...embellishing them
 I laid a felt heart on top of a paper doily and then wrapped twine around the jars several times to hold that in place and tied a knot.  I didn't want to glue the doily and the heart down because I might want to use these jars for Christmas or another occasion where red is appropriate.  That is it!  You could finish them at that but I wanted mine to be a little more colorful for a centerpiece so I filled them with silk flowers from the dollar store and then added in some fun heart garland made into little "curly q's".  That was all there was to it!  
 I used a red tray that I usually use at Christmas and then filled the tray with plastic hearts from the dollar store and then placed my vases on the center of the table and it was the perfect centerpiece.
I think these would be so cute for Easter or Sprint using pastel colors and filling them with pretty spring flowers!  I think I will be making a set for that too.  I'm thinking pinks, blues, yellows and greens.  

Happy Valentine's Day!

Sunday, November 10, 2013

. . . Painted Mason Jar Christmas Arrangements . . .

I love all things Mason Jars but don't have a lot of them sitting around my house but if you walk into my garage I have them all over the place just waiting to be used in a project like this one.  It's like they keep calling my name in desperation so my husband won't throw them all away.  Believe me he has threatened to just trash all my little jars and containers that I now hoard but luckily he is too nice to do it for real.  Phew!

These are going to add such a great "pop" in your house and the best is that they can be used for any season!  It's as easy as buying some paint and a few little inexpensive items that you might just have around the house. 
 I have painted glass coffee bottles and loved how they turned out but always hated how the craft acrylic paint chipped right off when I would try to put flowers or something in them.  This time I had a brainstorm to use latex paint that I had in the garage to paint my jars and I loved how these turned out!  Believe me it's worth using the latex paint because once it's dry it doesn't just chip off--at least mine hasn't.  I don't want to make any promises in case you come back and tell me yours chipped but so far so good with mine.

This project really couldn't be easier and you will love getting compliments from everyone about how creative and crafty you are.  I promise I won't tell anyone that these are super simple and require very little effort.

You will need:
Clear Glass jars--these are Walmart brand canning jars so there was no logo on them
Paint--acrylic craft paint or latex paint in the color of your choice
Lids for your jars
Washi tape
Ribbon
Floral sprigs
Cardboard or heavy paper to drain the paint 
Wooden Skewers to keep the bottles up off the cardboard or paper (Brilliant Tip thanks to Landee See Landee Do)
 Prepare your work area with a piece of cardboard or heavy paper to drain the paint out of the bottles

 I used white latex paint with primer that I had leftover from some painting projects I recently finished.  I just spooned it into the jars and then swirled the paint to coat all the sides of the jars and then slowly let it drain to the very top of the jar and then flipped them upside down on my skewers so they would drain out.

 I left my jars to drain for the morning and then flipped them upright and let them dry overnight so they would be good and "Set" so they wouldn't chip when I put my floral arrangements together.

 I used the lid rims and covered them with washi tape and then screwed them on the jars.  My original plan was to use several thin pieces of ribbon to hang these glittery ornaments from the jar but I didn't end up liking the look of that.

 When the tape is on you are ready to work on the arrangement which is super simple!

 I decided to use sheer organza ribbon in red and just tied a piece around the jar just under the lid.

 To help old the floral sprigs in place I filled each jar with black beans but you could use rice or any floral foam to help hold them in place.  I just filled the jar 3/4 the way full of black beans.

 Then stick your floral arrangement in the jar making sure the "stems" are in the beans or rice or foam to make sure they stay put.  I just used 2 prearranged floral sprigs from the craft store so there was very very little work involved in this but they look so pretty!

 Easy as pie, right?  Nothing to it!

 So pretty for the holidays.

 Because I wanted the tape to show up I didn't fold the pine down around the lip of the jar but you could easily have something "draping" down over the sides of the jar if you didn't care to show the lid.

 These are now on a shelf I have on the landing of my steps and just add a nice pop of color to that small space.

I hope you enjoy making these too!  I love painting glass from the inside so it looks shiny and almost takes on a faux milk glass look.  Don't be afraid to use lots of fun colors too--it doesn't have to be just white paint.