Thursday, March 31, 2011

. . . Peeps Treat Topper Download . . .

As of 3/18/2012 the download is now offered with only black ink and a different font.  Many people found the original didn't print the color ink and the font left blanks so there is a slight change now.


For my son's class I am making Peeps Treats and wanted to package them creatively so I decided to create a cute Peeps Treat Topper and share it with all of YOU!  I'm so happy with the fun bright colors and hope you will enjoy the FREE Download.

You can download HERE
 Please feel free to share this topper download with your friends or tweet about it, Facebook about it or even blog about it.

The download prints with 2 per sheet of 8.5x11 paper and then you will cut it down around the border of the design.  Fold it in half and attach to a Snack Sized Ziploc bag.  I used colored staples but you could just use regular staples or even double stick tape.  Staples are the easiest and most durable in my opinion.


I would love to hear from you if you use this Download!

Linking up here:


. . . Homemade Mac and Cheese . . .

I love homemade Mac and Cheese and I use a recipe that my mom made for us when we were growing up but it isn't a very cream mac.  My sister was telling me about a great recipe she tried from the back of a pasta box and boy did that make me hungry for mac and cheese.  I made it last night and it was yummy! 
Thanks Claudia!


You will need:
8 oz Mueller's Elbow Macaroni
1/4 Cup Margarine or Butter
3 Tbsp. all purpose flour
1/8 tsp. dry mustard
1/8 tsp. salt
1/8 tsp. black pepper
2 Cups milk (I used Half and Half)
2 Cups shredded Sharp Cheddar cheese
1 Cup bread crumbs (I made my own out of Italian bread)

*I doubled my recipe so that I could have leftovers and enough to send a container to my mom.

1. Recipe at the ready
2.  Gather the ingredients 
3.  Boil your macaroni noodles for 9 to 10 minutes
4.  Melt butter in saucepan

5.  Add flour to melted butter and stir until smooth and bubbly
6.  This is starting to bubble and smooth out so you are almost ready to add the milk
7.  Gradually add your milk and stir until a low boil starts.  Make sure you are stirring constantly so the milk doesn't burn to the bottom of your pan.
8.  Drain your macaroni noodles and set aside

9.  I made my own bread crumbs out of Italian bread
10.  Add your cheese to the milk mixture
11.  Stir the cheese sauce until it's all melted and smooth
12.  Pour noodles and cheese sauce into a baking dish and mix well


13.  Top with bread crumbs and bake for 25 minutes
14.  It browns so nicely with the bread crumbs on top
15.  Look at all that cheesy goodness!
16.  Dish up and serve

I hope you enjoy the recipe!


Wednesday, March 30, 2011

. . . Easter Egg Candle Sticks . . .

I love cruising through all the wonderful projects that are posted on Linky Parties.  I find so many amazingly talented people by looking at all the great ideas.  The other day I came across JC's Loft and found this awesome idea for candlesticks made from Plastic Easter Eggs.  Um, cute right?  So I tackled mine over the weekend and wanted to share because they are super easy to do as long as you don't mind measuring and a little drilling.

• I used the unfinished wood discs from the woodworking section at HobLob in two different sizes. 
• Dowel Rods (I am not sure how big mine were I just had them in my garage)
• Decorative Easter Eggs-Mine were 6 to a pack from HobLob and I used up 9 of them for 2 sticks
• Paint for the wood pieces
• Drill and bits
• Glue-I used E6000 in the holes before I put in the dowels.


You are going to drill a hole in the center of your discs but make sure you have them facing the correct direction because I wasted one because I wasn't thinking and drilled into the top instead.  Oops 

You will also remove the little ribbon from the Easter eggs and drill a hole in the top and bottom so your dowel can go through the eggs.  I measured my dowel against my drill bits until I got the right width but you want to make sure you have a tight fit so they don't wiggle around.


I wish I could tell you how tall I cut my dowels but I really just put the amount of eggs I wanted on my dowel and then measure up a 1/2 inch and then sawed off the rest of the dowel.  You will want a little bit of dowel at the top so you can stick your top piece onto the dowel. 


Paint your discs--both top and bottom for the one that your candle will sit on.


Paint color of your choice.  You could easily spray paint these too.


I used the E6000 glue down in the hole and then stuck in the dowel.  Then I stacked the eggs on the dowel and then put a little more glue in the hole for the top piece and stuck it to the 1/2 inch of dowel sticking up from the eggs.  

Tada....finished with one!  Easy right. 

There are my two sizes and now it's time for ribbon. 

I added a piece of pink polka dot ribbon to the top and the bottom discs--just right around the lip of the disc as you can see. 

Aren't they cute?


I couldn't decide exactly where I wanted them to be displayed so I photographed them in several places
before they found a permanent home. 

I love those little bunnies from Target! 

I found taking photos was difficult on this project so I apologize I don't have pictures of each and every step.  If you need more of a detailed tutorial for sure hop over to JC's Loft for her step by step guide.

Linking up here:

Tuesday, March 29, 2011

. . .Cookie Time Tuesday-Toffee Chocolate Chip . . .

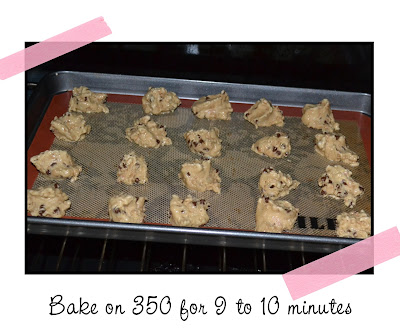
This week I tried my hand at Toffee Chocolate Chip Cookies.  The Fresh Market has these killer Toffee Crunch Cookies that I have always loved and I've tried to duplicate the recipe and it never quite turns out as well as their cookies...until now!  I love these cookies.  They aren't really thick cookies but they sure do pack a big flavor in them.  I hope you enjoy making them.

Print Recipe HERE

You will need:
½ Cup butter, softened
½ Cup shortening
1 Cup light brown sugar, packed
¼ Cup sugar
1 egg, beaten
1tsp. vanilla extract
2 Cups All Purpose Flour
1 tsp baking soda
½ tsp baking powder
¼ tsp salt
2 Cups mini chocolate chips
6 oz. package toffee baking bits


I'd love to hear from you if you make this recipe!  Let me know what you think.

Linking up:

Monday, March 28, 2011

. . . Mustache and Lips Notecard Design . . .

I had a customer recently ask me to create a card with a mustache and lip graphic with "mr. and mrs." below it.  I usually don't play favorites when I design a card but I am over the moon with this adorable design!  I just think they turned out so cute.  I am not sure which style I like best...how about you?
  Watch for it to be available soon in my online shop. 
•••••••
•••••••
•••••••

. . . Paint It Yourself Birdhouses . . .

I was at Michael's a couple weeks ago and saw these adorable unfinished birdhouses.  I love to paint but prefer to stick to painting walls versus something I've made but I figured this would be a cute project for my son and I to do so why not get a couple.  They were $1.99 each and I snatched three of them up.  Pulled out the acrylic paint and set to work.  I don't have very many photos because it was hard to paint and snap pics but basically they start out completely unfinished and then you paint them to your liking and add extra embellishments as you see fit.  I have seen these on several other blogs and it's amazing how different than can look.  Check out Simply Designing to see how hers turned out--I love them with the antiqued look to them! You can also see how cute My Garden of Eden did hers--love!
•••••
••••• 
••••• 
He would kill me if he knew I
 posted this photo--we were too lazy
 to get an apron on can you tell? 
•••••
••••• 
•••••
•••••
Linking Here:
http://www.sugarbeecrafts.com/

Sunday, March 27, 2011

. . . Guest Post from The Autocrat-Easter Egg Topiary . . .


I am so excited to have Haley, from The Autocrat Blog here today with this absolutely AMAZING Easter Egg Topiary!  She has the best ideas on her blog and you will get so much inspiration when you stop over there.  Leave her some nice comment love while you are there. 

She also has a fantastic online shop over on Etsy--Haley Davis Etsy Shop.  I just got my camera strap cover from her and it is fabulous and girly!
•••••
Hello Itsy Bitsy Paper readers! It’s Haley here from
I am thrilled to be over here to share the tutorial for an

 Easter Egg Topiary!

EASTER EGG TOPIARY FINAL
Supplies:
two styrofoam balls: 8” and 6”
7-8 packages of plastic eggs
Krylon’s Bahama Sea blue spray paint
brown, beige, dark blue craft paint
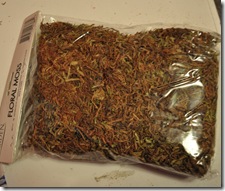
3 bags of moss
dowel rod at least 1/2”
hot glue gun and sticks
pot with floral foam
ribbon for accent
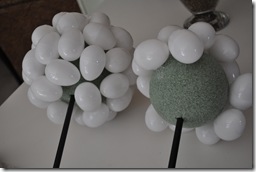
EASTER EGG TOPIARY 1
Hot glue eggs onto styrofoam balls.
The hot glue melts the styrofoam a little;
therefore you will have to hold the egg
in place for a few seconds.  Be sure to mark
the center hole for the dowel in the bottom ball for the
top ball - you do not want an egg covering up that space.

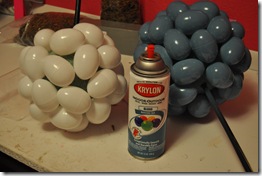
EASTER EGG TOPIARY 2
Spray paint eggs.  I used Krylons, Bahama Sea.
It covered very well.

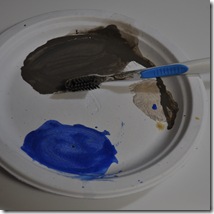
EASTER EGG TOPIARY 3
I used a toothbrush to splatter the eggs with
brown, beige, and dark blue.  Dilute the paint a little
with water so it can “splatter” nicely.  You can add
as much or as little as you want.  After the splatter
I used a clear finishing spray over all the paint.

EASTER EGG TOPIARY 4 (2)
I purchased this moss at DT for only a $1
a bag.  I used a little under 3 bags.  I glued it here
and there; most of it stuck in between the egg
and stayed put.

EASTER EGG TOPIARY 4
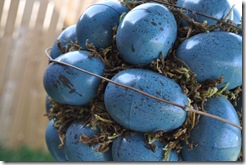
I had some extra grapevine that I placed over the
eggs for a finishing touch.  The grapevine added a little
extra touch to make it look more natural.

EASTER EGG TOPIARY FINAL
Place your painted egg balls onto your dowel
rods and then place into your pot.
I opted for a bow, but it looks good without one too!
This project takes a little bit of time, but it is
totally worth it.  It really doesn’t cost that much either.

Hope you have enjoyed my tutorial.  Hopefully, I have given you some
inspiration for your spring and Easter decorating.
Thanks for having me!