I think the Target Dollar Spot is my all time favorite spot to shop. It's like I walk in those doors and there are big spot lights over it just calling me to the mother ship! You can just find such great things in that little area of heaven! I picked up a bunch of these little wooden plank plaques that were part of the nautical collection knowing I'd have no real use for them being blue and pine but I did know I'd be using them for something fun and this project couldn't have made me happier!
This is the little plaque I purchased from the dollar spot. Originally it had a white rope threaded through the holes at the top but I knew I'd be changing that to basic twine so I cut that off before I painted them.
I gave my three plaques a few coats of white spray paint but you could easily use a chalk paint or any brush on paint just as easily.
I coated mine pretty well but wasn't terribly worried if I missed a spot because I knew I was going to sand them and then add dark stain to antique them so it wasn't a big deal if they weren't perfect.
I picked my numbers up at Michael's for $1.49 each and even used a coupon so that made them a bit cheaper.
I gave the numbers a few coats of spray paint making sure to cover each side and then let them dry well.
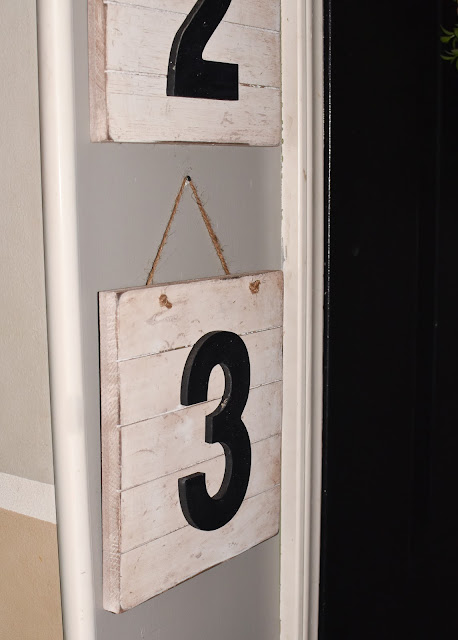
Please ignore the terrible lighting in this photo but as you can see I have sanded the bright white paint down quite a bit and then added Espresso wood stain lightly over the whole thing trying to get into the creases of the slats and around the edges. Once that was dry I lightly sanded it off so it wasn't as dark and then used furniture wax to coat the number and the board. It gives it such a nice silky smooth finish when it's waxed. I then used E6000 adhesive on my number and attached it to the board. I let this dry for awhile before hanging them.
To hang them I used just basic twine and threaded it through the holes and tied knots off on the front of the boards to hold it in place. The important thing if you are doing more than one of these is to make sure each piece of twine is the same size for each board! It makes it look pretty weird if one board has a ton of twine and another board has a little twine so measuring is your friend here! I used just basic nails but may switch to a more decorative nail to hang them. I haven't decided. As you can see I also made sure to rub the sides of the boards with some of the dark stain as well so it all matched.
You really can't get much easier than this little project and could do all sorts of different things with these boards.
I hope you will make something fun with these little plaques too!







No comments:
Post a Comment
Thank you for stopping by to say "Hi". I love getting your comments.
If you like my what you see here I'd love for you to become a {Follower} so you can join in on the fun. Also join me on Facebook and Instagram!