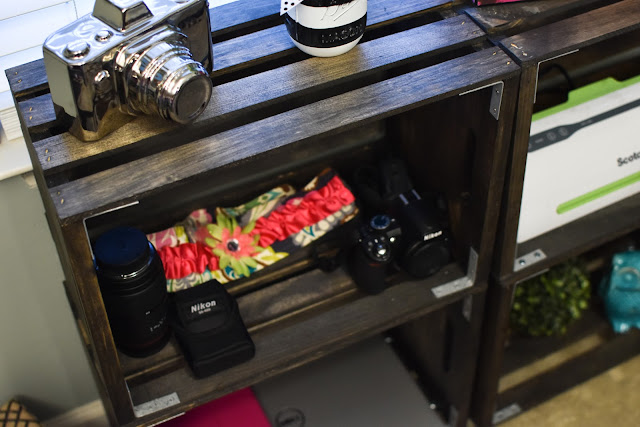
I have always aspired to be a handy girl and be able to build things and use power tools and all that. I even have a small collection of power tools and my very own tool box and have a decent knowledge of how to do things but I have never really built anything. I suppose this is kind of cheating but it feels like the first thing I've built and I'm so excited.
You know those wooden crates you see at every craft store and home improvement center? Well, I love them! If you remember I made a book case out of them for my son's room and they have held up great and give him a ton of good storage. Well, in my office area/photo shoot space I was running out of storage so I was brainstorming some ideas when I thought of these crates and how I could "build" a storage area and also have a surface for setting up photo shoots. I ran off to Home Depot and started gathering my supplies and after about 25 trips to Home Depot to get things I kept forgetting I finally built my storage unit and I love, love, love it!
To Make one of your very own you will need:
Wooden Crates from any craft or home improvement store
Wood Stain
2 inch swivel Casters (wheels)
4 Corner Braces per crate (I used 2 inch braces)
Mending Plates to hook the shelves together (I used 3 inch plates)
Drill
Screwdriver
1/2 inch wood screws (unless you buy kits and they already have them)
3/4 inch wood screws (unless you buy kits and they already have them)
To make these you will want to sand the crates first and then apply wood stain. I used Ebony by Minwax and loved the color it came out. I only did one coat because I wanted more of a rustic look but you could go for several coats if you wanted something darker. I used an old t-shirt to rub it on and then let it dry well. For cracks and crevices I used an old paint brush to really get the stain in those hard to reach areas.
Once the crates were dry I added the corner braces to the inside of each corner. These serve no purpose other than adding some detail so you could certainly skip this step if you wanted to.
After the braces were in place I chose the side of the crate I wanted for the bottom "Shelf" and screwed the casters into place. Because my caster plates were too wide to fit on one plank of the crate I moved them a bit further back and attached them to 2 planks instead. I think this will make sense when you do yours.
I made the mistake the first time and got casters that didn't swivel which wouldn't work for what I needed so back to Home Depot for the swivel ones. To save yourself the trip make sure you get the swivel style if you intend to move your shelves around. You could also get locking casters but I chose not to go that far.
Once the casters have been attached to the bottom 2 crates you are ready to add your mending plates to link the top and bottom together. I made sure the crates were lined up and then drilled the holes for the plates and attached them to the two crates to keep them linked together. I did 2 of them on each corner but could have used three to add one more in the center of the crates but now that things are inside the crates they are very sturdy. If you wanted to make sure they were extra sturdy feel free to add the third one in the center.
I didn't link mine together side by side because I will probably be moving them around. If you wanted to keep them in place and don't really plan on moving them you could add mending plates to link the crates together side by side too.
This will be perfect for storing my laptop, ipad, camera equipment, laminator and so much more! Because of the slates I can also slip cords down through and you don't see those floating around either.
Perfect!
Now I'm ready to build something else!


