It's bunny season and I'm so here for it! I've been busy getting the house "lightened" up for the upcoming spring temps and while I'm doing that I have thought of several fun crafts I want to do. Why is it that when I decide to craft in one tiny corner my entire house proceeds to fall apart around us? I don't know how a couple blocks of wood and a few bottles of paint can be blamed on laundry not getting done and the dining room being piled with crap and the floors needing a good scrub but in my house that is how I roll every single time I am crafting.
These blocks were so simple to make! I shared a quick video on Instagram for you to see the simplicity of this project and I also am sharing that video here. Side note...if you aren't already following me on Instagram what are you even doing!? Hop on over there and give me a follow for diy, crafts, recipes and more!
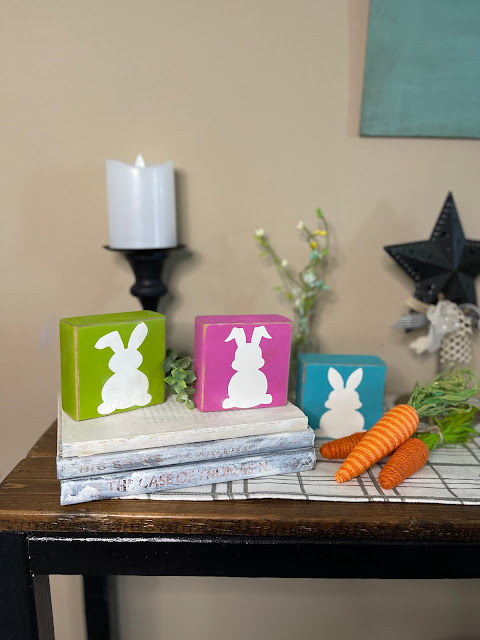
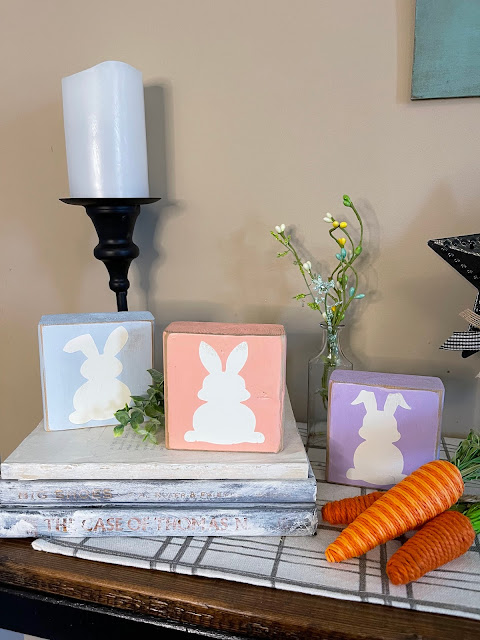
I did these blocks in both pastel colors and bright colors and in the end my favorite was definitely the bright! I think it all depends on your personal style and what works in your home and even though I don't use these specific bright colors in my decor they just seemed to work better.
To make these you will need:
• 2x4 inch board cut into small blocks...I cut mine to be 3 1/2 inches "tall"
• Paint of your choice
• Stickers or vinyl you've cut out. I designed mine in Silhouette Studio and then cut them out on permanent vinyl but you could buy stickers at the craft store or if you are really talented you could hand paint them!
• Wood Stain for distressing
• Sandpaper for distressing
The video below shows you the general process even though it's a time lapse but I will also do a step by step for you.
To make your blocks:
First I painted the front of the block white going right up to the edges but not quite all the way there because I didn't want the white to show through when I distressed the edges at the end.
Once the white paint was dry I smoothed it with some fine grit sandpaper and then applied my bunny sticker and pressed it down very firmly so it wouldn't move when I painted over it.
I then chose my color of paint and painted two coats over the entire block.
Once all the paint was dry I sanded the edges to distress the wood and then I put a coat of Special Walnut wood stain over the whole block and then wiped it right back off. I did this just to age the block a small amount. I made sure to leave my bunny sticker on until the very end because I didn't want the white to get dark when I applied the stain.
After the wood stain I then peeled my bunny sticker off and then used white paint to do any touch ups that might need done.
That is it! So simple!
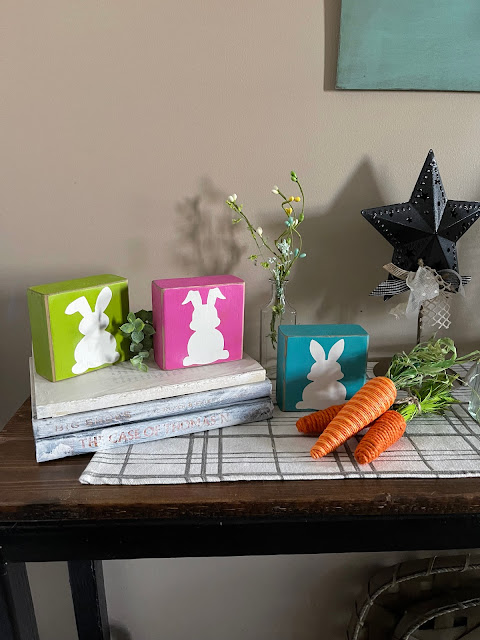
Do you decorate for Easter and Spring? I don't do a lot of it but I like adding a few touches here and there which is why I love crafts like this because they are super easy to make but add a big impact when you see them sitting out. Also when it's time to clean up it takes no time at all!


No comments:
Post a Comment
Thank you for stopping by to say "Hi". I love getting your comments.
If you like my what you see here I'd love for you to become a {Follower} so you can join in on the fun. Also join me on Facebook and Instagram!