


I love cruising through all the wonderful projects that are posted on Linky Parties. I find so many amazingly talented people by looking at all the great ideas. The other day I came across JC's Loft and found this awesome idea for candlesticks made from Plastic Easter Eggs. Um, cute right? So I tackled mine over the weekend and wanted to share because they are super easy to do as long as you don't mind measuring and a little drilling.
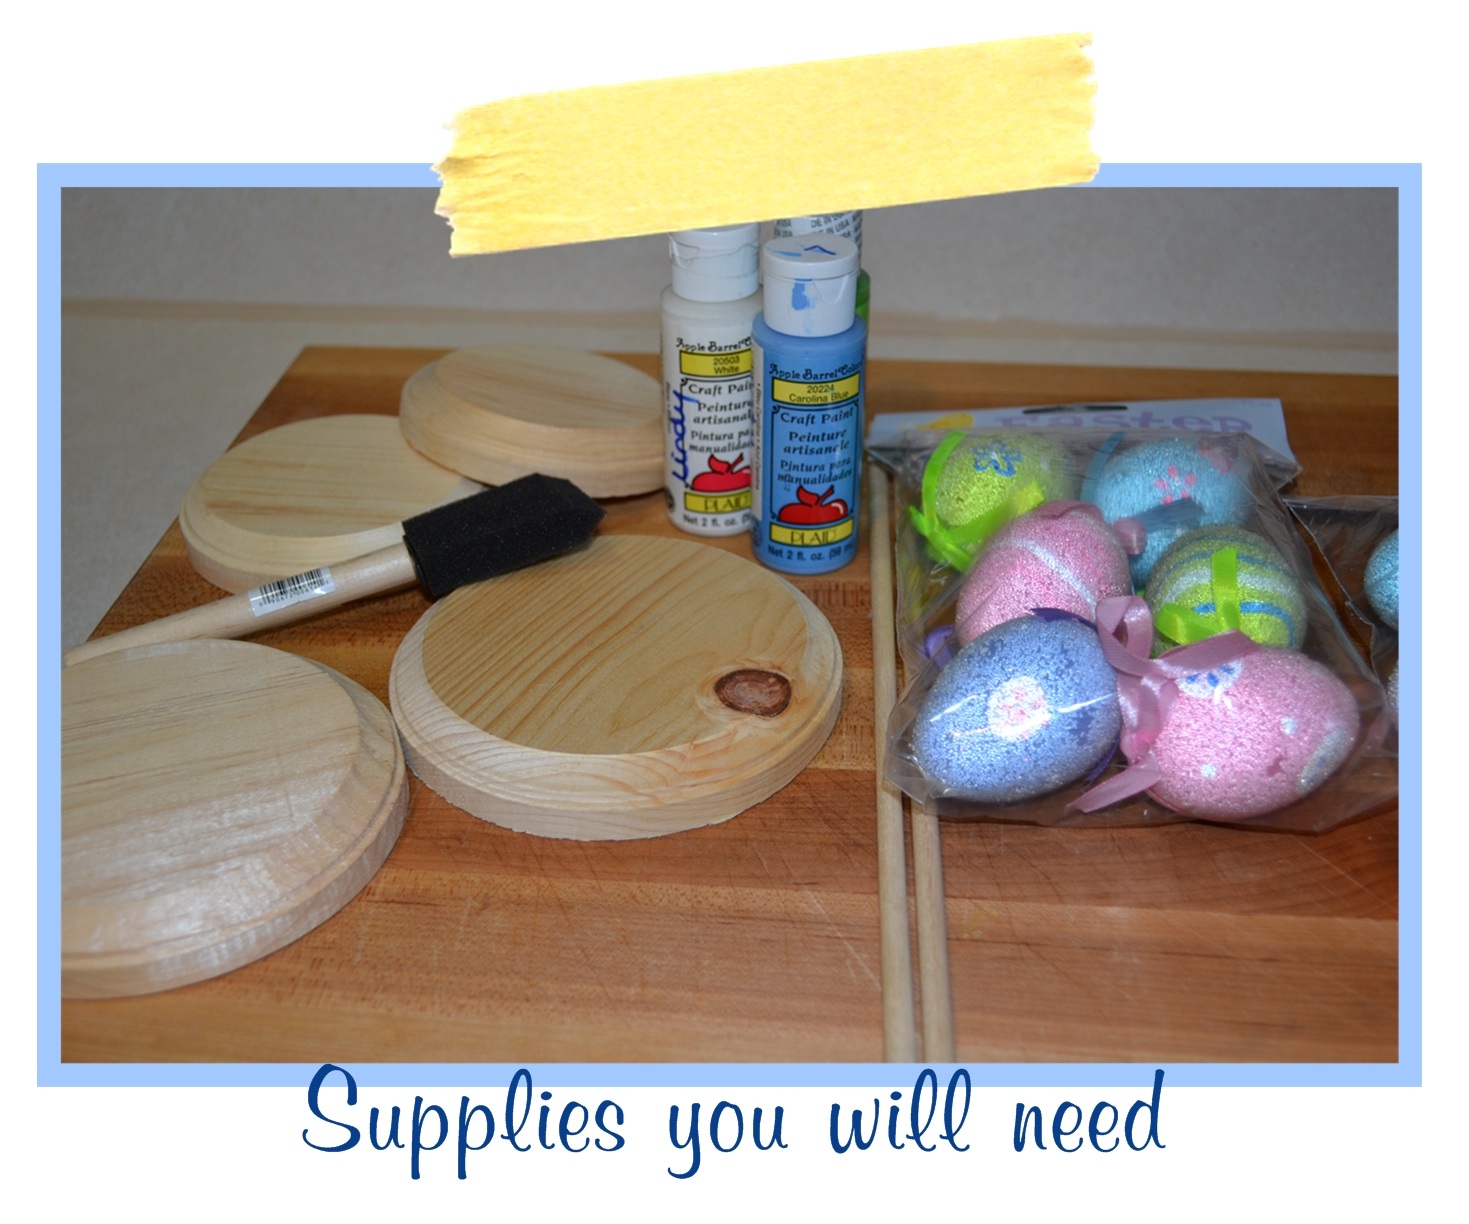
• I used the unfinished wood discs from the woodworking section at HobLob in two different sizes.
• Dowel Rods (I am not sure how big mine were I just had them in my garage)
• Decorative Easter Eggs-Mine were 6 to a pack from HobLob and I used up 9 of them for 2 sticks
• Paint for the wood pieces
• Drill and bits
• Glue-I used E6000 in the holes before I put in the dowels.

You are going to drill a hole in the center of your discs but make sure you have them facing the correct direction because I wasted one because I wasn't thinking and drilled into the top instead. Oops
You will also remove the little ribbon from the Easter eggs and drill a hole in the top and bottom so your dowel can go through the eggs. I measured my dowel against my drill bits until I got the right width but you want to make sure you have a tight fit so they don't wiggle around.

I wish I could tell you how tall I cut my dowels but I really just put the amount of eggs I wanted on my dowel and then measure up a 1/2 inch and then sawed off the rest of the dowel. You will want a little bit of dowel at the top so you can stick your top piece onto the dowel.

Paint your discs--both top and bottom for the one that your candle will sit on.

Paint color of your choice. You could easily spray paint these too.

I used the E6000 glue down in the hole and then stuck in the dowel. Then I stacked the eggs on the dowel and then put a little more glue in the hole for the top piece and stuck it to the 1/2 inch of dowel sticking up from the eggs.

Tada....finished with one! Easy right.

There are my two sizes and now it's time for ribbon.

I added a piece of pink polka dot ribbon to the top and the bottom discs--just right around the lip of the disc as you can see.

Aren't they cute?

I couldn't decide exactly where I wanted them to be displayed so I photographed them in several places
before they found a permanent home.

I love those little bunnies from Target!

I found taking photos was difficult on this project so I apologize I don't have pictures of each and every step. If you need more of a detailed tutorial for sure hop over to JC's Loft for her step by step guide.
Linking up here:


What a cute project!
ReplyDeleteI love those!! Super cute!! I'd love for you to stop by my blog and check out book club if you're interested...new follower btw--connie, measuredbytheheart.blogspot.com
ReplyDeleteThanks for stopping by Third Floor Design Studio! I love this idea! I've been searching for a good Easter project -- this might just be it. Thanks for sharing!!
ReplyDeleteThose are great!
ReplyDeleteAH I love them! So cute that you added the ribbon to them!!!! So easy right?!
ReplyDeleteI am getting ready to add yours the bottom of my post...thanks so much for letting me know : )
Have a fabulous rest of your day,
Paula @ JC's Loft
These are so cute!!!! Love how they turned out!
ReplyDeleteKelly
This is such a great, cute and simple idea! I adore it. Thanks so much!
ReplyDeleteVery cute! I have to say my favorite is the bunny though. I have a thing for orange and polka dots :)
ReplyDeleteVery cute, I think I need to add this to my VERY long list of projects!
ReplyDeleteThis is adorable, I must borrow your idea!! Thank you so much for sharing such a great tutorial!
ReplyDeletexoxo
Kelli @ loveoursimplelife.blogspot.com
Oh my these are just too cute. Love them totally. So glad I found your blog..
ReplyDeleteLove Love Love! And may have to make some for myself this week!
ReplyDeleteWould love for you to share on my new link party!
http://allthingsfee.blogspot.com/2011/04/want-to-party.html
I've checked out your project so many times, how clever and pretty! Thanks for linking to my party, I'll be featuring this one, please come back again this weekend and show off more projects!
ReplyDelete